Veneer - A Mystery to many woodworkers
Most
amateur woodworkers and many professional woodworkers have never used
wood veneer in a project. But most of us have used plywood
products in our projects. And we all know that plywood is made
from veneer, usually oak, cherry, maple, and to a lesser extent, more
exotic woods like walnut. Plywood is also available in some
tropical hardwoods, but finding it is exceedingly difficult. For
my Mahogany entertainment center, for example, I need plywood made with
very fine South American Mahogany veneer. I seriously doubt such
plywood even exists in a commercial product, but if it did, I would
expect it to be extremely expensive. So I really only have two
options: I could make the entire project out of solid
Mahogany. The problem doing this is very simple, Mahogany
hardwood is very scarce and in my area, is priced starting at over
$11.00 per board foot. And I would have to find enough solid
mahogany that is consistent in color, figure, and free from defects,
and in the thickness I need for each of the constituent parts.
This would be a very expensive option and difficult option.
My other option is to make my own plywood out of high quality Mahogany
veneer, which means I only need to find a relatively small amount of
solid Mahogany for the legs, door styles and rails, etc. The
very first class I ever took at the
Marc Adams School of Woodworking was a class taught by
Darryl Kiel, president of
Vacuum Pressing Systems,
on the basics of working with veneer. This class completely
changed my woodworking life and taught me a wonderful and very
different approach to woodworking. Even extremely scarce and
exotic hardwood that would be impossible to find as solid wood is
usually available as veneer. In fact, by turning precious and
scarce hardwood into veneer, veneer manufacturers are effectively
preserving a scarce resource. By learning to work with veneer, a
woodworker is able to take advantage of this fact in his own projects.
Finding veneer locally, however, might be a challenge in itself.
Small quantities of some veneers are available through woodworker
stores like Woodcraft, but you will not find large quantities or scarce
veneer. For that, I use
Certainly Wood out
of New York. They have a huge selection of veneers from all over
the world, and have an extremely knowledgeable sales staff. There
are numerous other sources on the Internet for veneer, but I have been
very pleased with both the quality of the veneer I received from
Certainly Wood and with their sales staff.
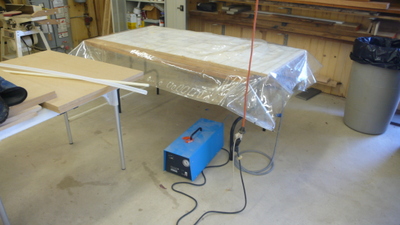
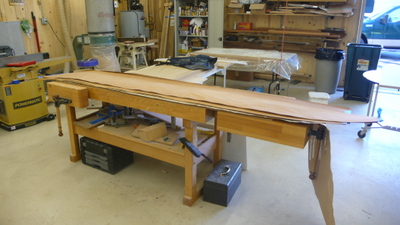
If you do any serious work with veneer, a must have tool is a vacuum press. The
vacuum press works on the principle that if you remove all the air from
inside the bag, the weight of the atmosphere will press evenly on
whatever is inside the bag. Depending upon your elevation above
sea level, a vacuum press is capable of putting between 1500 and 1700
pounds per square foot of pressure on the object you are gluing.
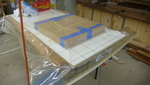
On the right is a picture of some panels being pressed between two MDF
platens.
Substrate and Glue
I’ve heard a lot of misinformation about gluing veneer, particularly
regarding the type of glue you should be using. The absolute
worst glue you can use on a veneer project is contact cement. I’m
amazed at how often I see some magazine advise using contact cement for
veneer, or worse yet, occasionally on a woodworking television
show.
Contact cement is formulated to be used with rigid material like formica. Contact cement
does not form a rigid glue line and
always maintains a certain amount of flex or give.
White and yellow glues are better, but still do not result in a rigid
glue line. Additionally, the working time for white or yellow
glues is relatively short so you have to work quickly before the glue
sets up. The best glue for working with veneer is one of a family
of glues based on urea formaldehyde because it has a relatively long
open time and cures based on a catalytic reaction.

I’ve
used a product called Unibond800 for years and have great success with
it. Unibond800 has the unique characteristic of an absolutely
rigid glue line after curing. This makes this glue ideal not only
for veneer but also for bentwood lamination work. When using it
for bentwood lamination, I experience virtually no spring back after
removing the work piece from the glue form.
It does have a couple of drawbacks. First, it has a relatively
short shelf life of about 6 months to a year, depending upon the
temperature you’re storing it at. And second, since you add a
catalyst powder to the glue, you must use whatever you mix because
whatever is left will cure rock hard. Third, and this is a
relatively minor one, the glue cures best in a warmer
environment. If you are doing a glue up and the temperature is
below 70 degrees, you need to cover the project with a heating blanket,
or else the glue might not set at all.
The substrate you choose needs to be perfectly flat, free from any voids or surface defects, and as free from

seasonal woodmovement as possible. Plywood is an excellent
choice, but you need to select high quality plywood that is free from
internal voids. MDF is a wonderful substrate for veneer because
it is dead flat, free from any internal voids, and will not change
dimensions seasonally. The pictures on the left and right show a piece
of MDF that I’ve applied 3/8 thick mahogany edge banding to. I"m
using a hand plane to bring the edge banding exactly to the surface of
the MDF, and will eventually glue the veneer on top of the edge
banding, giving the illusion of solid wood. There are really only
two techniques for edging a veneered panel:
- Veneer the panel, trim it, then apply the hardwood edge.
This technique must be used for off-the-shelf plywood, but not
necessarily for shop-pressed panels. An advantage to this
technique is that the hardwood edge will effectively capture and
protect the delicate veneer. The disadvantage is that you must
figure out some way to level the appled hardwood edge perfectly with
the veneer.
- Apply the hardwood edge to the naked panel. Finish and
level the hardwood perfectly flush with the surface of the
substrate. By making the edging slightly oversized knowing it
will be trimmed to final size after application of the veneer, you now
veneer over both the MDF and the hardwood edge. After the glue is
set, the edges can be trimmed using a panel saw or table saw, the edge
treatment can be done to achieve a finished look. The main
advantage to this technique is that it becomes almost impossible to
distinguish where the veneer ends and the hardwood edge begins.
The disadvantage is that the width of the applied hardwood edge must be
limited to a relatively small size - 3/8 to 1/4". Leaving the
hardwood edge any wider runs the risk that natural wood movement in the
hardwood edge will result in cracks in the veneer. With a
relatively narrow hardwood edge, edge treatments are quite limited to a
gentle roundover.
Specialized Tools for Veneer
|
|
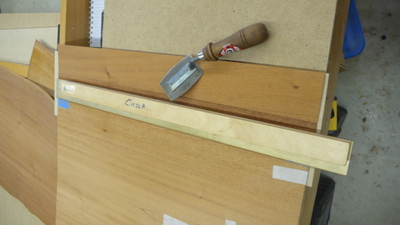
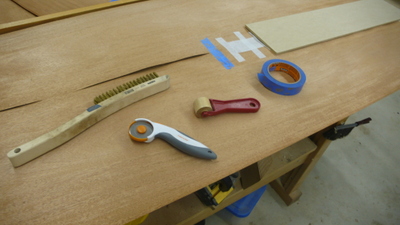
Cutting veneer can
be done using a variety of tools depending upon the type of veneer and
the specific type of cut being made. A good straightedge and a
veneer saw is one of the more common methods.
|
The fabric cutter
(white with orange) is an example of a tool designed for another
purpose (cutting fabric) that can be extremely useful for certain types
of veneer cuts. In addition to the veneer saw and fabric saw, I
occasionally us a very, very sharp chisel that I’ve slightly modified
to cut veneer, and I also have a surgeon’s scalpel that is “scary”
sharp. I tend to use the scalpel more when I’m doing marquetry or
when I’m trying to cut difficult veneer with squirely
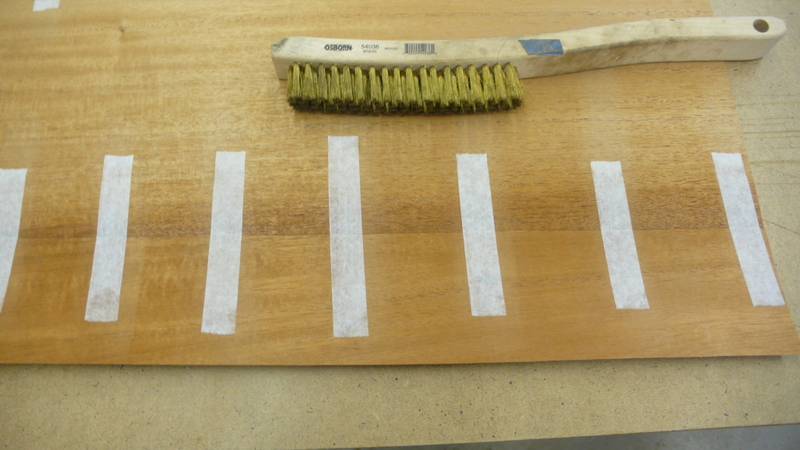
grain. The soft bristle brass brush is used to massage the
moist veneer tape to get the best possible surface contact with the
veneer tape. The little roller is a wallpaper roller I stole from
my wife years ago. I use it to massage the seams to get the seam
perfectly flat.
|

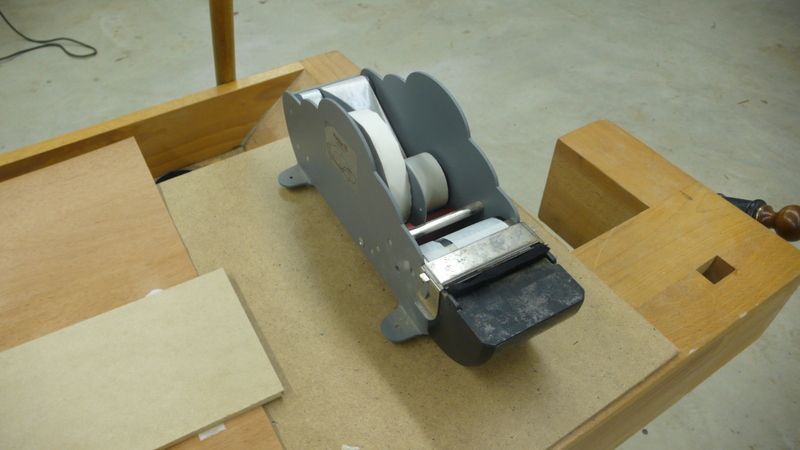
Veneer
tape is probably the most unusual item. It is a thin paper tape
with a moisture activated glue on one side. This tape dispenser
makes moistening and cutting the tape easy. Veneer tape comes in
various widths and can easily be applied without a dispenser. A
simple moist sponge is really all you need to get started.
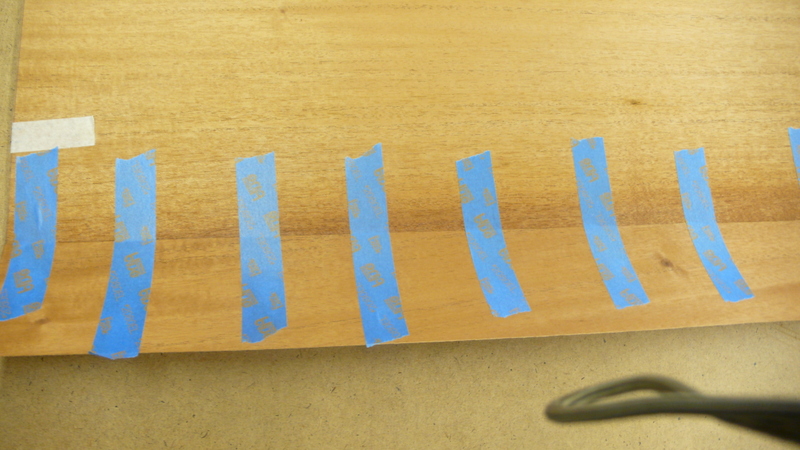
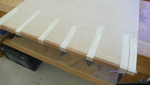
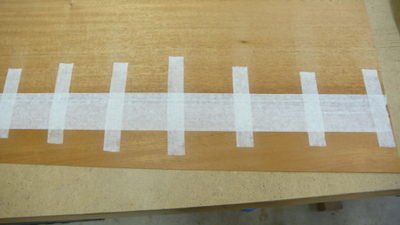
The following sequence of photos shows the process of seaming two
pieces of veneer together. I first cut both pieces for the joint
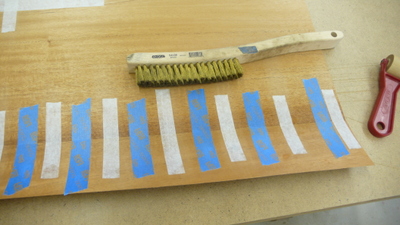
using a straightedge and veneer saw. Next I use blue painters
tape to carefully align the two edges together. I use one inch
veneer tape across the joint followed by two inch veneer tape along the
joint. The bottom photo shows the result after pressing.
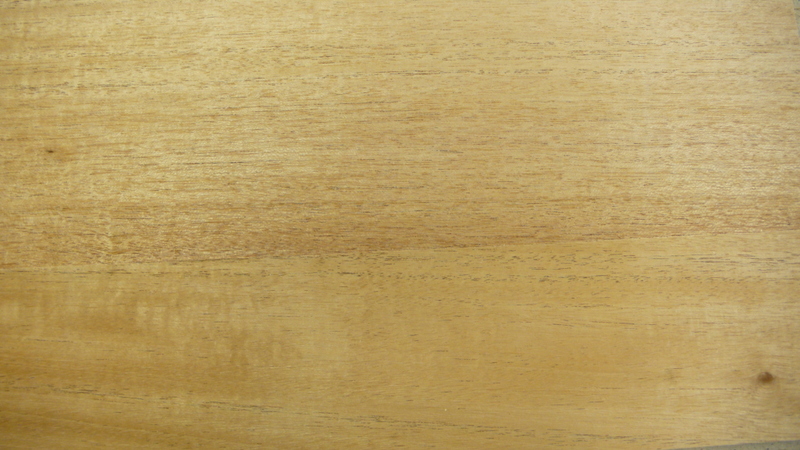
The photo will not really show it, but the resulting joint is virtually
invisible!
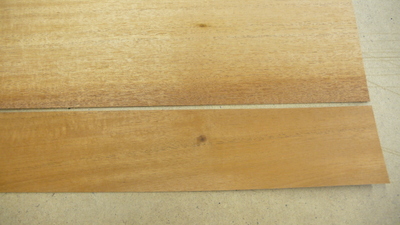
|
Here are two pieces of veneer that have been edge jointed and are ready to be joined together.
|

|
The first step is to carefully bring the edges together using
blue tape. The technique is to start at one end and work toward
the other end using one strip of blue tape at a time. The idea is
to "stretch" the blue tape across the seam causing the tape to pull the
seam tightly together. This is harder to explain than it is to
do! The basic idea is to press the tape to the veneer on one side
of the joint, then stretch the tape across the joint (gently) before
you adhere it to the other side.
|
|
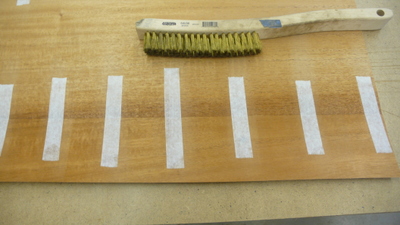
Moisened veneer tape is next placed across the joint.
There is no need to "stretch" the veneer tape because it will have a
natural tendence to shrink as it dries, thus pulling the joint tightly
together.
|
|
After a few minutes, it is now safe to remove the blue tape.
|
|
I use a wide piece of veneer tape to go lengthwise across the
seam. The wide piece of tape is applied directly over the narrow
pieces.
|
|
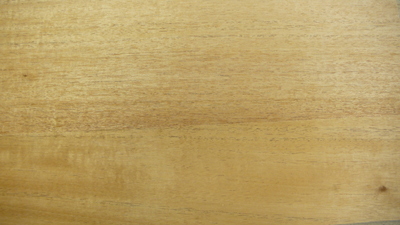
After pressing, the joint virtually disappears!
|
 Most
amateur woodworkers and many professional woodworkers have never used
wood veneer in a project. But most of us have used plywood
products in our projects. And we all know that plywood is made
from veneer, usually oak, cherry, maple, and to a lesser extent, more
exotic woods like walnut. Plywood is also available in some
tropical hardwoods, but finding it is exceedingly difficult. For
my Mahogany entertainment center, for example, I need plywood made with
very fine South American Mahogany veneer. I seriously doubt such
plywood even exists in a commercial product, but if it did, I would
expect it to be extremely expensive. So I really only have two
options: I could make the entire project out of solid
Mahogany. The problem doing this is very simple, Mahogany
hardwood is very scarce and in my area, is priced starting at over
$11.00 per board foot. And I would have to find enough solid
mahogany that is consistent in color, figure, and free from defects,
and in the thickness I need for each of the constituent parts.
This would be a very expensive option and difficult option.
Most
amateur woodworkers and many professional woodworkers have never used
wood veneer in a project. But most of us have used plywood
products in our projects. And we all know that plywood is made
from veneer, usually oak, cherry, maple, and to a lesser extent, more
exotic woods like walnut. Plywood is also available in some
tropical hardwoods, but finding it is exceedingly difficult. For
my Mahogany entertainment center, for example, I need plywood made with
very fine South American Mahogany veneer. I seriously doubt such
plywood even exists in a commercial product, but if it did, I would
expect it to be extremely expensive. So I really only have two
options: I could make the entire project out of solid
Mahogany. The problem doing this is very simple, Mahogany
hardwood is very scarce and in my area, is priced starting at over
$11.00 per board foot. And I would have to find enough solid
mahogany that is consistent in color, figure, and free from defects,
and in the thickness I need for each of the constituent parts.
This would be a very expensive option and difficult option.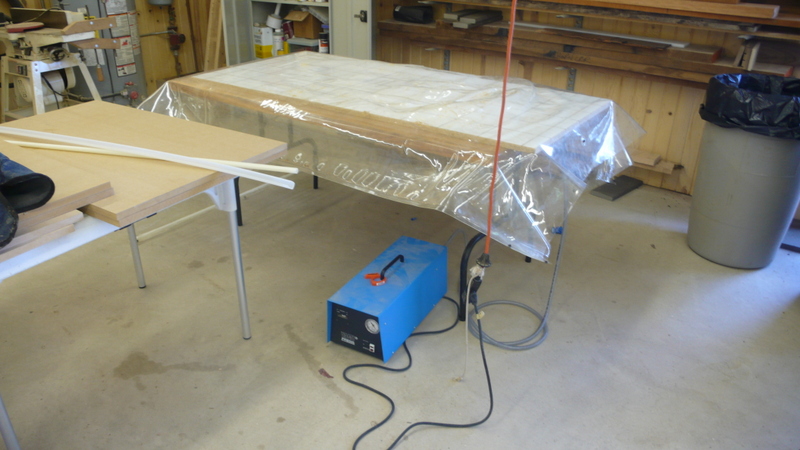 If you do any serious work with veneer, a must have tool is a vacuum press. The
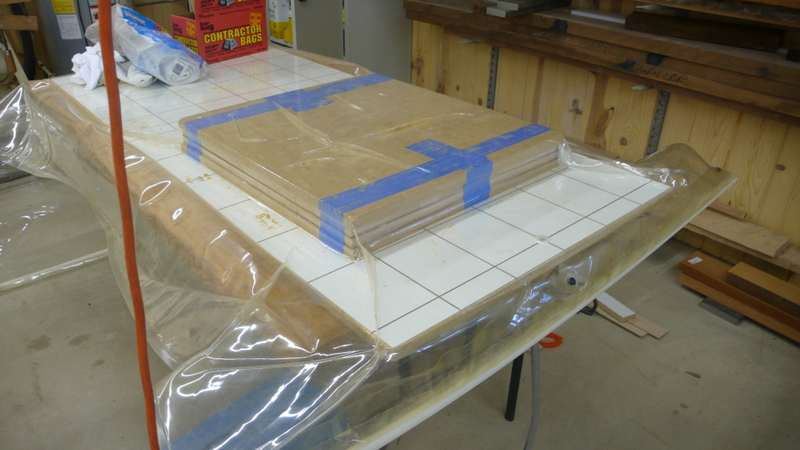 vacuum press works on the principle that if you remove all the air from
inside the bag, the weight of the atmosphere will press evenly on
whatever is inside the bag. Depending upon your elevation above
sea level, a vacuum press is capable of putting between 1500 and 1700
pounds per square foot of pressure on the object you are gluing.
On the right is a picture of some panels being pressed between two MDF
platens.
vacuum press works on the principle that if you remove all the air from
inside the bag, the weight of the atmosphere will press evenly on
whatever is inside the bag. Depending upon your elevation above
sea level, a vacuum press is capable of putting between 1500 and 1700
pounds per square foot of pressure on the object you are gluing.
On the right is a picture of some panels being pressed between two MDF
platens.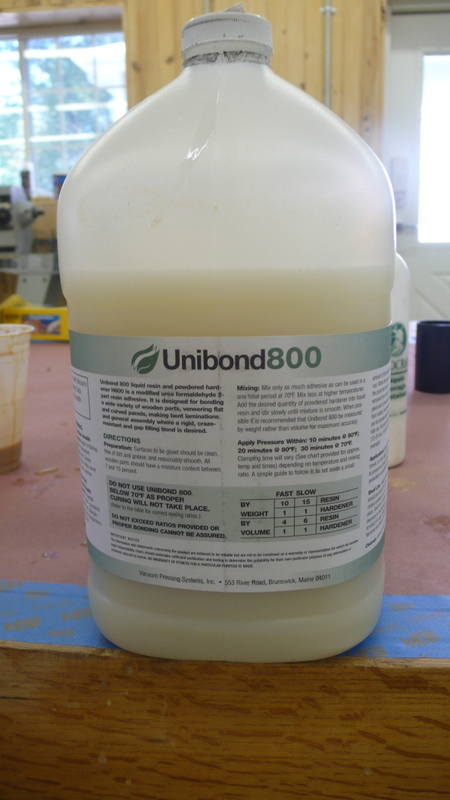 I’ve
used a product called Unibond800 for years and have great success with
it. Unibond800 has the unique characteristic of an absolutely
rigid glue line after curing. This makes this glue ideal not only
for veneer but also for bentwood lamination work. When using it
for bentwood lamination, I experience virtually no spring back after
removing the work piece from the glue form.
I’ve
used a product called Unibond800 for years and have great success with
it. Unibond800 has the unique characteristic of an absolutely
rigid glue line after curing. This makes this glue ideal not only
for veneer but also for bentwood lamination work. When using it
for bentwood lamination, I experience virtually no spring back after
removing the work piece from the glue form. 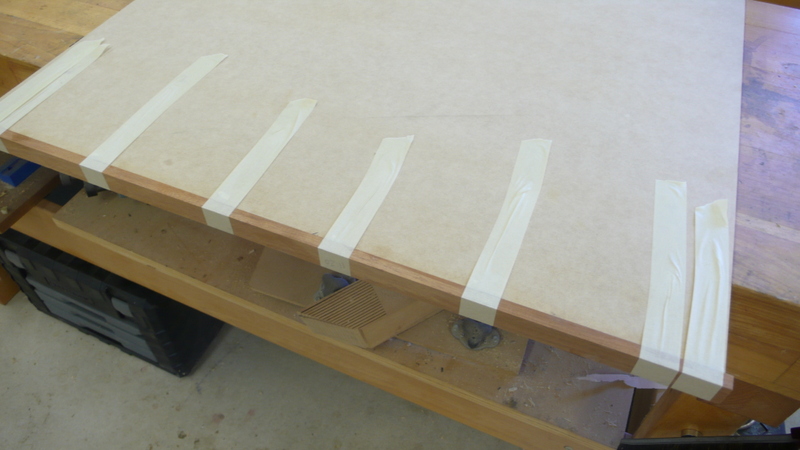 The substrate you choose needs to be perfectly flat, free from any voids or surface defects, and as free from
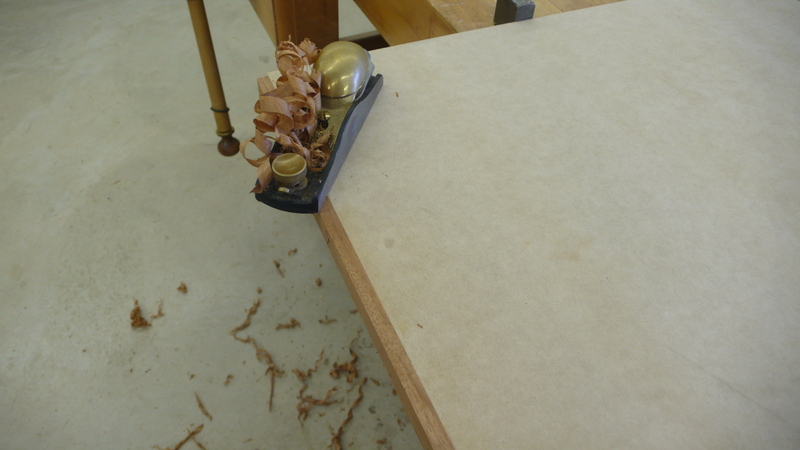 seasonal woodmovement as possible. Plywood is an excellent
choice, but you need to select high quality plywood that is free from
internal voids. MDF is a wonderful substrate for veneer because
it is dead flat, free from any internal voids, and will not change
dimensions seasonally. The pictures on the left and right show a piece
of MDF that I’ve applied 3/8 thick mahogany edge banding to. I"m
using a hand plane to bring the edge banding exactly to the surface of
the MDF, and will eventually glue the veneer on top of the edge
banding, giving the illusion of solid wood. There are really only
two techniques for edging a veneered panel:
seasonal woodmovement as possible. Plywood is an excellent
choice, but you need to select high quality plywood that is free from
internal voids. MDF is a wonderful substrate for veneer because
it is dead flat, free from any internal voids, and will not change
dimensions seasonally. The pictures on the left and right show a piece
of MDF that I’ve applied 3/8 thick mahogany edge banding to. I"m
using a hand plane to bring the edge banding exactly to the surface of
the MDF, and will eventually glue the veneer on top of the edge
banding, giving the illusion of solid wood. There are really only
two techniques for edging a veneered panel:

 Veneer
tape is probably the most unusual item. It is a thin paper tape
with a moisture activated glue on one side. This tape dispenser
makes moistening and cutting the tape easy. Veneer tape comes in
various widths and can easily be applied without a dispenser. A
simple moist sponge is really all you need to get started.
Veneer
tape is probably the most unusual item. It is a thin paper tape
with a moisture activated glue on one side. This tape dispenser
makes moistening and cutting the tape easy. Veneer tape comes in
various widths and can easily be applied without a dispenser. A
simple moist sponge is really all you need to get started.