Stained Glass Panels
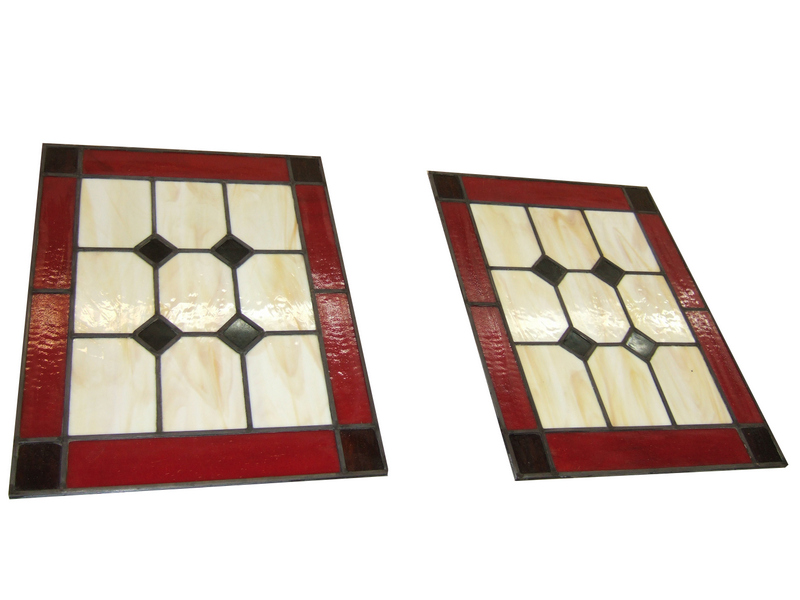
When
I designed my entertainment center, I knew I wanted to incorporate
stained glass panels in the doors. At the time, I naively
assummed I could just visit my local glass supplier and order custom
stained glass panels. Things are never that easy, and my glass
supplier told me that, as far as he knew, custom glass panels like I
wanted were simply not available. He suggested I visit a stained
glass shop where he thought they might be able to fabricate my
windows. That visit was quite a learning experience. I was
lucky because the proprieter was a very nice man who suggested that
rather than have him make the glass panels for me, why don't I learn
how to make them myself. I thought, well, why not?
I have to admit that at first, working with glass was a bit
intimidating, and in many ways, it is very different from
woodworking. But in many other ways, it is very similar.
Precision and accuracy are key to both, as is having someone to hold
your hand, mentor and guide you. I took a short class in basic
stained glass, nothing as elaborate as these panels, but learned enough
to become somewhat confident I could make my own panels.
Since this entertainment center project was done over two years, it was
quite a while before I was finally ready to make my windows. In
the meantime I completed quite a few other woodworking projects, but
the entertainment center sat for most of that time covered in blankets
in a corner of the shop, waiting for me to get back to it. When
the time finally came to build these windows, I was dragging my feet
because I was worried I could pull this part of the project off.
As with many "learning experiences," the first panel took me
about 8 hours to complete. But the second panel only took an hour
and a half! I'll share just a few pictures of the panel-making
process because I'm still not yet confident enough in my stained glass
skills to write with any authority about it. But I will say that
after I got the hang of it, it was a truly enjoyable experience.
|
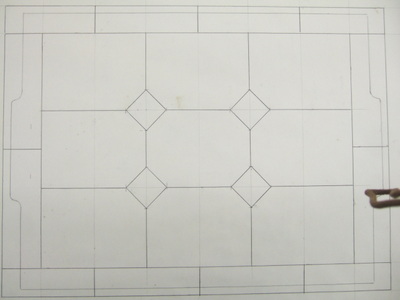
An accurate drawing of the glass panel, dimensionally correct, is the starting point.
|
|
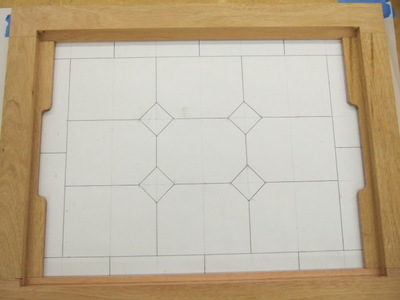
Here
you can see the drawing of the stained glass panel under the door
frame. If my glass panel comes out exactly the same size as the
drawing, it will fit perfectly in the frame.
|
|
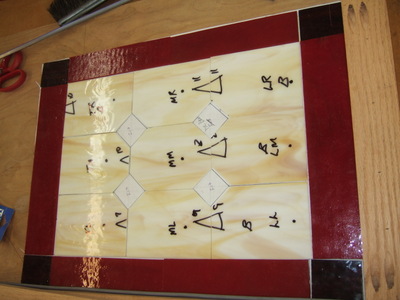
Here
is a picture of all the glass pieces after being cut laid in the
approximate arrangement they'll have in the final panel.
|
|
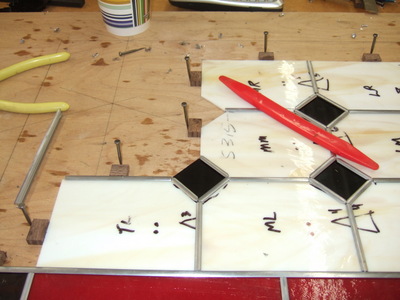
Here
I'm fitting lead came around the individual pieces of glass. I'm
doing this in a squaring jig I made out of plywood. The nails you
see are tapped into the plywood with a small wood block between the
nail and the glass. These hold the glass while I build the panel
starting in the lower left corner out to the upper right corner.
|
|
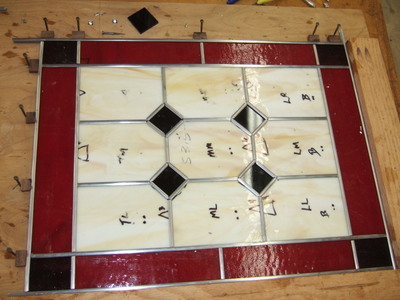
Here
is the panel ready for soldering the joints. You can also see the
squaring jig I fashioned out of a couple of scraps of wood. I
used a soldering iron with flux to solder each joint where one or more
pieces of came come together. After soldering both sides, the
panel becomes rigid, but it is not yet finished. The final step
is to apply a cement to the entire glass panel, both sides. and work
the cement into the joints where the glass goes into the came.
After the cement drys, it hardens making the panely weatherproof.
This technique goes back nearly 1000 years and is well documented on
the web.
|

