Marc Adams School of WoodworkingThe Marc Adams School of Woodworking is to woodworking what Princeton is to physics! Located a little south of Indianapolis, founder Marc Adams has created what many say is the finest woodworking school in the United States and possibly the world. Marc has combined a passion for education and an extraordinary knowledge of woodworking with an uncanny ability to attract some of the finest woodworkers in the world to teach at his school. His facility is huge complex filled with the finest woodworking tools and equipment on the market today. Marc is constantly adding to this collection and steadfastly refuses to accept donations or sponsorship from tool manufactures. Instead, he chooses what he considers to be the very best equipment available from all the manufactures, pays the same price you or I would for the machines, and only places tools in his school that provide the precision and durability demanded by professional shops. A walk through the school is “eye candy” to a tool nut like myself. I’ve written a brief description of the classes I’ve taken at the Marc Adams school to give you an idea of what I’ve personally learned and how each of these classes has improved my woodworking skills. The curriculum at the Marc Adams School is vast and I’ve just scratched the surface of the classes that I want to take. I set aside one week each year for a personal retreat to this woodworking Mecca and intend to continue doing this as long as I’m physically able. Finishing with Mitch Kohanek - 2009 Designing Chairs with Michael Fortune - 2008 Hollow Vessel Turning and Patination with David Marks - 2007 Veneering with Darril Keil - 2006 Finishing with Mitch Kohanek - 2009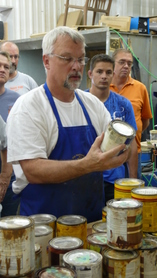 Mitch Kohanek
has been an instructor for the Wood Finishing Technology Program at
Dakota County Technical College in Rosemount, Minnesota since
1978. He has forgotten more about finishing wood than any other
woodworker I've ever met knows! Mitch is truly an expert in all
aspects of finishing wood and once again the quality of the instructors
that Mark Adams brings in to teach did not disappoint. One
elderly gentlemen in class (in his mid 80s) remarked, (somewhat
forlornly) "This should have been the first class I ever took!" Mitch Kohanek
has been an instructor for the Wood Finishing Technology Program at
Dakota County Technical College in Rosemount, Minnesota since
1978. He has forgotten more about finishing wood than any other
woodworker I've ever met knows! Mitch is truly an expert in all
aspects of finishing wood and once again the quality of the instructors
that Mark Adams brings in to teach did not disappoint. One
elderly gentlemen in class (in his mid 80s) remarked, (somewhat
forlornly) "This should have been the first class I ever took!" It's difficult to summarize all that I learned in this class, but probably the single biggest lesson reminds me of one of Stephen Covey's seven habbits: "Begin with the end in mind!" Before you start a woodworking project, even before you cut the first board, I learned the importance of having the specific finishing schedule worked out. Before this I was like the majority of woodworkers and finishing was the very last thing I did. In fact, many of my finished projects were given to my wife to finish because she has a better eye for color and a better sense for how to match things. Mitch pointed out that most woodworkers fear the finishing step because it really is an "afterthought" and seems like a "black art." The reality is that, like anything else, once you understand some basic concepts, it really is not that difficult. And there is simply no substitute for playing with different stains, dyes, varnishes, lacquers, and shellacs to get a feel for what they do. So now, before I do anything else, I make sample boards with different finish schedules to find the one I want. Here are several key takeaways I learned in this class that I now use in the shop on a regular basis:
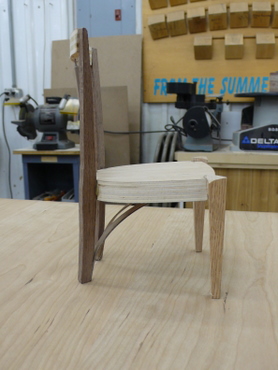
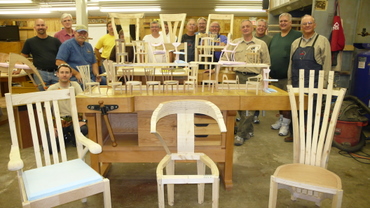
Designing Chairs with Michael Fortune - 2008 Michael Fortune is a professional furniture maker from Canada who may also be familiar to you because of his many articles in Fine Woodworking. Michael is a trained artist and furniture designer with an extraordinary gift to be able to design jigs and fixtures that allow him to join pieces of wood that come together in three dimensional space at impossible angles. He has developed his own personal approach to furniture design and construction that is elevated well beyond anything I’ve personally achieved. Spending a week with this humble, kind, and generous man was truly a privilege. I say that because Michael freely shared techniques he developed over his long career that any corporation would consider trade secrets and would guard fiercly. For me personally, this was one of the most difficult classes I’ve ever taken of any kind in both my professional and private in my life. I took this class to expand my skills and learn how to design furniture, specifically chairs. I think that conceiving of a piece of furniture in your mind’s eye, designing it on paper, then building it is probably the ultimate woodworking accomplishment. While this class focused specifically on chair design, the general principles and concepts apply to designing any piece of furniture. We were asked to prepare for the class by studying chairs we felt were comfortable and to bring to class certain dimensions and measurements. Michael’s approach to chair design is to start out with some very basic geometry that is common to most chairs. Using these dimensions, we began to sketch various ideas in ¼ scale on paper. Once satisfied that we had an idea worth taking to the next level, we created a ¼ scale model of the chair. Creating the ¼ scale model may seem like a lot of work, but this was the single most important lesson I learned during this class. By doing this, you can easily visualize geometry, proportions, and most importantly, you can easily make adjustments to the model. In fact, Michael would walk from bench to bench, pick up a student's model (which was assembled using hot melt glue) and immediately twist a leg into a different position, or adjust the angle of the seat slightly, or even turn a leg completely around. It was also quickly obvious from the model if it was even worth moving to the next stage in the design process, or if it would be better to scrap the model and start all over. Eventually I came up with a ¼ scale model that I felt was good enough for an academic exercise. The next step is to create a full size drawing of the chair using simple drafting techniques. Prior to this step, we were advised to pay no attention at all to joinery and focus instead on design concepts. At the drawing board, we worked out exactly how each joint would be created. After the drawing was completed, a mock-up of the chair was built using cheap construction lumber. This again was a real learning experience for me since our natural inclination (after we have a drawing) is to start cutting our expensive lumber. But by taking the time to build the mock-up, you have another opportunity to make changes to the design as you attempt to come close to the actual joinery. Seeing the mock-up you also have another opportunity to make minor or major changes, or to scrap the entire design and start all over. This process of going from a ¼ scale model to a mock-up is another key learning I took away from the class. It is wise to not fall in love with your first attempt at designing anything, and to be prepared to spend days or weeks at this stage of the process.
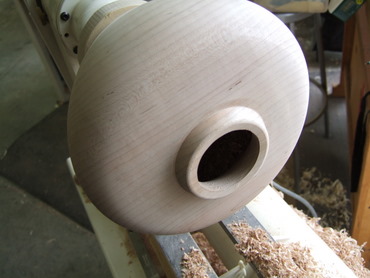
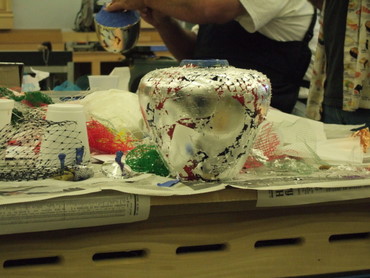
Hollow Vessel Turning and Patination with David Marks – 2007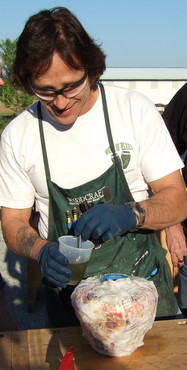 David
Marks is the host of the DIY Network
television show Woodworks.
This was the second opportunity I had to take a class with David and I
really enjoy David’s unique combination of skills. As a
woodworker he is clearly a cut above the vast majority of
hobbyist. What makes David exceptional, however, is the way
he
combines his talent as an artist with the exacting precision of
woodworking. David is also a natural teacher and all around
nice
guy who is a real pleasure to spend time with. David
Marks is the host of the DIY Network
television show Woodworks.
This was the second opportunity I had to take a class with David and I
really enjoy David’s unique combination of skills. As a
woodworker he is clearly a cut above the vast majority of
hobbyist. What makes David exceptional, however, is the way
he
combines his talent as an artist with the exacting precision of
woodworking. David is also a natural teacher and all around
nice
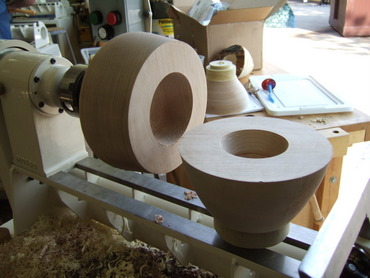
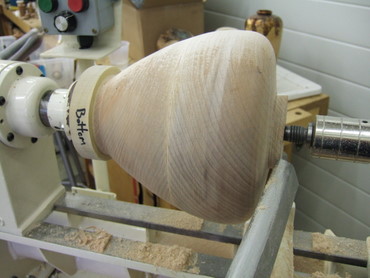
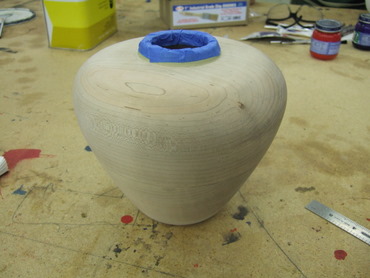
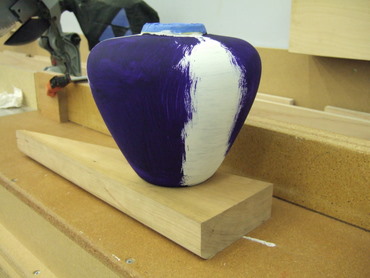
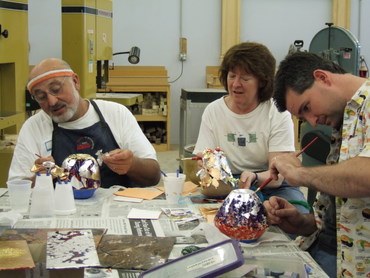
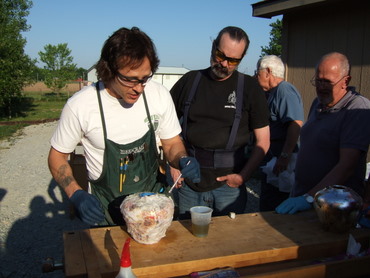
guy who is a real pleasure to spend time with.It seems that woodworkers are divided into two distinct and different camps; you either work with flat boards and build furniture or you turn wood into round objects. It seems rare for a woodworker to do both, let alone excel at both. This class challenged me because I’m a “flat board” guy and am by no means a turner. David’s class was essentially divided into two different parts; part one was spent learning how to turn a hollow vessel. Hollow vessel turning is considered an advanced turning skill but David’s approach greatly simplified the process and made it possible for non-turners to create a reasonable object. The second part of the class completely switched gears and focused on learning David’s techniques for decorating wood objects with guilding and by using special chemicals, applying patinas to create a look that could never be achieved any other way. It was fascinating to watch the way David completely changed personalities for this part of the class. For the first part where we were learning to turn, David exhibited all the exacting precision and technical skill needed for fine woodworking. For the guilding and patination part of the class, David completely transformed himself into a free-thinking and playful artist. His style was to encourage the six year old natural artist in each adult to come back, and success was more about being playful and creative – like we all were when we were six and had yet to learn all the things we could not do!
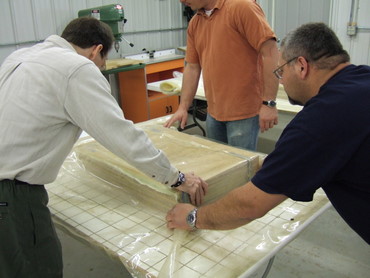
Veneering with Darryl Keil My
first class ever at the Marc Adams School of Woodworking was a week
long class in veneering taught by Darryl Keil. Darryl is the
president of Vacu
Press and is an inventor of the vacuum pressing system that
he sells. Darryl's company is also the source of the Unibond 800
veneer glue that is an integral part of the veneering process. My
first class ever at the Marc Adams School of Woodworking was a week
long class in veneering taught by Darryl Keil. Darryl is the
president of Vacu
Press and is an inventor of the vacuum pressing system that
he sells. Darryl's company is also the source of the Unibond 800
veneer glue that is an integral part of the veneering process.I was interested in learning about working with veneer for two reasons. First, even living in the Chicago area, access to hardwood suppliers is scarce. There are only a very few suppliers that specialize in hardwood, and then they feature mostly North American hardwoods like oak, cherry, walnut, maple, and ash. Some exotic woods are available in limited quanties, sizes, and figures, but these tend to be very expensive. So the second reason I wanted to learn how to veneer was really to be able to feature unusual and highly figured woods in some of my projects for less money. In the years since I've taken this class and learned how to work with veneer, I've incorporated veneer into several projects. Here are a couple:
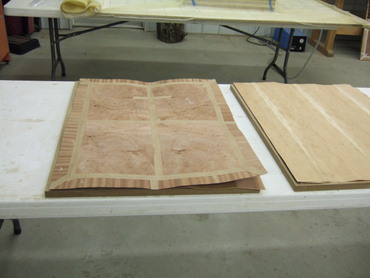
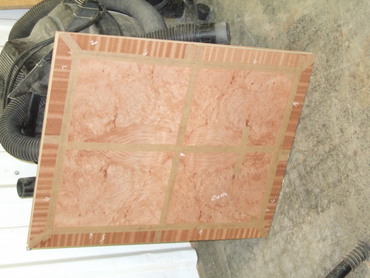
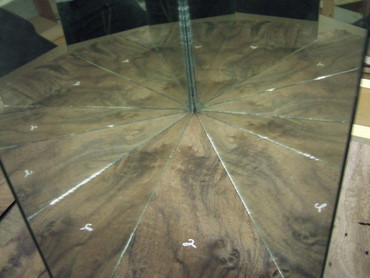
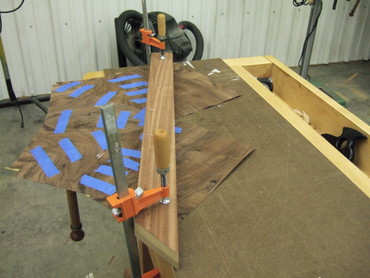
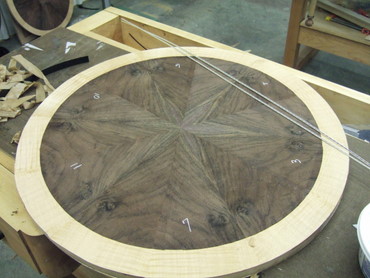
The class at Marc Adams focused on three things: 1. We learned the basics about how to work with veneer. This included skills like how to cut veneer sheets, and how to build large panels of veneer from smaller pieces. 2. We learned how to create a four-way book match using madrone burl veneer. This was a simple rectangular table top. 3. We learned how to create a 12-way radial bookmatched round table top. This was challenging and a huge learning experience. I've documented the step by step process of how this is done in case you are interested.
|