Larry Ciesla Woodworking


Wedding Arbor


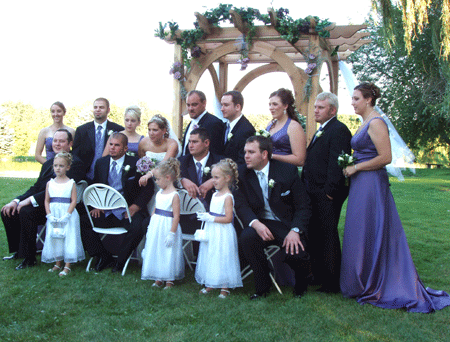
My son had an outdoor wedding and my future daughter-in-law asked if I could make a wedding arbor.  The arbor had to be designed to be quick to setup and breakdown since the place where the wedding was going to be held insisted that the arbor not remain on their property overnight.  The arbor I designed was held together by a total 20 screws and could be setup or brokedown in 1/2 hour.  The arbor is made entirely from cedar to allow it to stand up to the elements and weigh as little as possible.  The only real technical challenge was the four semi-circle arches that form the internal bracing and structure of the arbor.  The top also presented a challenge in that it had to be designed to interlock to provide cross bracing so the arbor would not rack.

The key to a project like this is making templates.  I like to make templates out of 1/2 inch MDF because it is cheap and very stable.  Each side of the arbor is 5 feet and the overall height is 8 feet plus the height of the top assembly.  The key to this project was the template I made for the semi-circle arches.  While the arches are a semi-circle, flat and vertical surfaces had to exist at either side to attach the 4x4 vertical posts.

I wish I had done a better job photographing the process, but hopefully you can get the gist of how this was done.


The drawing at the left is a conceptual representation of how to cut 2x12 pieces into 6 parts that could be splined together to form a rough semi-circle.  Look closely and you  will see the basic arch I was trying to achieve.  180 degrees divided by 6 means that the angle between each ray is 30 degrees. (Back to Top)

Here you see one of the arches after glueup.  Notice the dog ears that are used to clamp each piece to the next. (Back to Top)

A spline is used to add considerable strength to each joint.  I used Polyurathane glue which cures in the presense of moisture and foams like you see here as it cures. (Back to Top)

Here is one of the arches clamped up.   (Back to Top)

Here are two of the completed arch assemblies.  I made a template out of 1/2 in MDF that was the exact shape of the arch then used a router with a large pattern bit to trim to the final shape.  Of course the dog ears were cut off with a jig saw before this step.  A roundover bit was used to ease the edges. (Back to Top)
Here is one of the drawings I used to design the top lattice assembly. (Back to Top)
I made templates out of 1/2 MDF to create the lattice.  If you look closely at the drawing, you will notice that the top and bottom 2x4 template are the same but just flipped over.  The same is true of the left and right 2x4 template.  So there was really only two 2x4 templates and two 2x8 templates.  These templates were made very precisely so that the 2x4s and 2x8s interlocked as shown in the drawing below. (Back to Top)
This shows how the six 2x8s and four 2x4s interlock with no mechanical fasteners.  If you look closely, you will see the templates  I mentioned on the assembly table.  Their job is now done and they are ready for the scrap pile. (Back to Top)
Here you see the top dissassembled after the fancy end has been cut. (Back to Top)
Here I use a template and router with a large pattern bit to create the profile on the end of a 2x8 member. (Back to Top)