|
Step 7: Remove sheets 1, 2, 11, and 12 from the
bundle and set aside for later
Step 8: Re-tape sheets 3, 4, 5, 6, 7, 8, 9, and
10 with blue tape to again secure the sheets from movement within the bundle.
Step 9: Since you removed sheet 1 from the
bundle, your original drawing of the triangle that was on sheet 1 needs to be
redrawn on sheet 3. Use the mark along
edge B you made in step 5 to realign the triangle along side B and draw side A
on sheet 3.
Step 10: Clamp the bundle under the straightedge
and cut side A. Note that you are only
cutting side A on sheets 3 – 10 at this time.
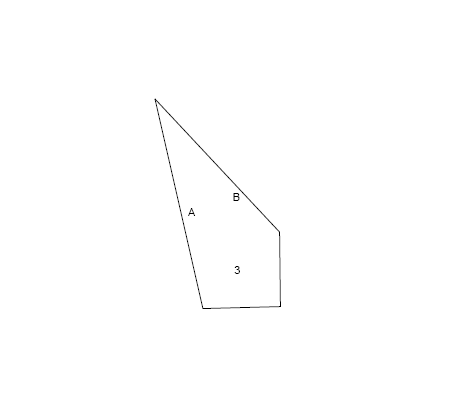
After this cut the bundle with sheets 3 – 10 should look something like the drawing on the left.:
|

|
Step 11: Remove the blue tape from the bundle and
starting with sheet 3, verify that the sheet number, A, and B designation
appear on each piece. Also recheck that
the sheet number and A/B designations are correctly shown on sheets 1, 2, 11,
and 12.
Step 12: You will now begin to assemble the left
and right sides of the circle using blue tape.
Be sure that the blue tape is placed on the opposite side of the veneer
taped tips. You will be flipping over
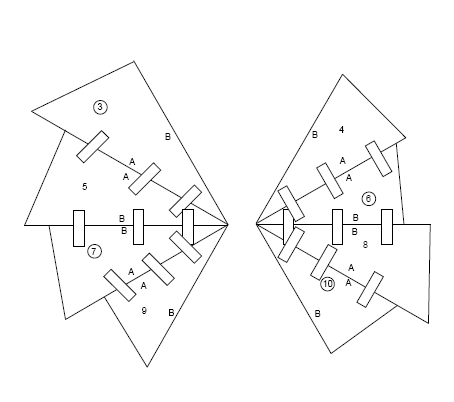
and edge joining the pieces as shown in the following drawing:
Again remember that a number in a circle means that that
piece is flipped over so that the side labeled A on one piece is adjacent to
the side labeled A on adjacent piece. Be
very careful to align the tips perfectly.
Note that the “blue tape” side is shown in these drawings. After everything is aligned perfectly, apply
veneer tape to the joints on the “veneer tape” side.
|

