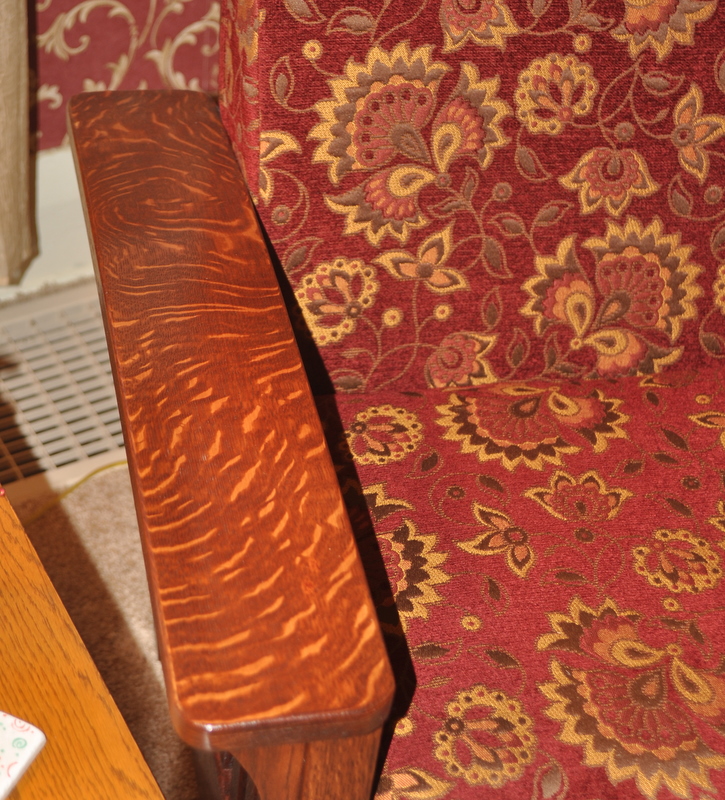
mission finish for quarter-sawn white oak
On this Arts and Crafts glider rocker, the finish is every bit as
important as the construction and joinery. Arts and Craft
furniture is often made from highly figured quarter-sawn white oak that
is finished in such a way as to emphasize the medulary ray fleck
pattern. Traditionally this classic finish was achieved by fuming
the piece in a strong ammonia vapor. The ammonia vapor reacts
with the natural tannic acid in the white oak leaving a lovely brown
appearance. The ammonia used for this process must be very
concentrated, much more so than the ammonia commonly available in
stores. You have to construct a sealed tent, place the piece to
be fumed inside with a dish of ammonia, then seal the tent and wait
until the ammonia reacts with the tannic acid and the look you are
after is achieved.
I chose a much different approach for this project, deciding to rely
instead on the finishing skills I learned during a week-long finishing
class I took a couple of years ago at the Mark Adams School of
Woodworking.
Story board
The single most important thing I learned about finishing is to begin
each woodworking project already having worked out the finishing
schedule. Before making the first cut on the project, create
several “story boards” with different finishes and choose the one you
will use for the project. Since I was making five glider rockers,
one for myself and four for good friends, I wanted to discuss the
finishing options well in advance and give my friends the chance to
select the look they wanted for their own chair. For many
finishes, this is as simple as picking up several different stains and
top coats at the local home center, and using each on a small sample
board to create an example of how the wood looks using each particular
combination. But you can’t achieve the look I was after out of a
can from the home center.
The look I wanted required the use of several products applied one
after the other, and most interestingly, the final look does not appear
until the final top coat is applied. I created several
storyboards, each of which illustrates the metamorphosis the wood goes
through as you work your way through the finishing schedule. By
using masking tape to cover over a small portion of the board after
each step, the impact of that step is revealed. This is important
if for no other reason than to help you keep your sanity as you work
through the various steps. As you apply each step in the
finishing schedule, the result leave the piece looking terrible.
You need the story board to refer back to so you can prove to yourself
you are on track. Without a story board, the finishing process
will be a miserable experience fraught with the nagging feeling that
you’ve just ruined months of work.
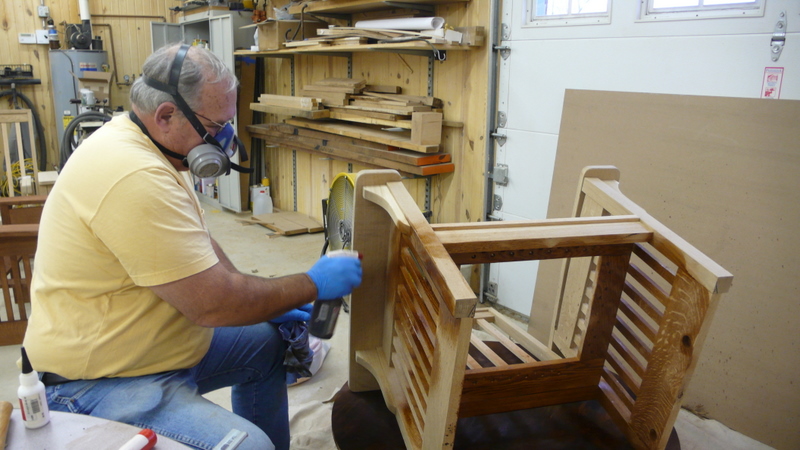
Another benefit to creating story boards is to learn how difficult each
step will be, and if it would be better to finish some or all of the
piece prior to final assembly. For this glider rocker, the lower
rocker assembly is a complex group of parts that hang the chair from
bearings that are tightly press fitted into holes drilled in the
various parts. After all these parts are assembled and the
bracing applied to make the lower assembly rigid, it simply would have
been impossible to access the parts for finishing. So I decided
to finish the lower assembly for each chair separately, but felt I
could do the upper part of the rocker – the chair itself, fully
assembled. Even this, however, was a dicey decision that balanced
the difficulty of applying the finish to the interior parts of the
chair against the added complexity of finishing them before assembly
then having to glue and clamp the parts together.
Creating a story board also helps you solve a problem with many
variables that include the species of wood and how it is cut from the
log, and from what part of the log it is cut. Even wood cut from
the same log can look quite different if it is a plain sawn board, a
rift cut board, or a quarter sawn board. Sap wood and heart wood
can behave very differently under an applied finish and if you are
working with wood with a lot of sap wood, you might have to find a way
to treat the sap wood differently to cause it to blend harmoniously
into the rest of the board. The specific type of colorant you
choose can have a tremendous impact on the final look. Dye stain
colors the wood without using pigments which tends to accentuate the
figure but not the grain. Pigment stains accentuate grain but
tend to hide figure. Some top coats are crystal clear and others
have an amber cast. Top coats themselves fall into families like
shellac, lacquer, and varnish. Lacquer and varnish can be
solvent-based or water-based. The number of variables can become
very large and when you think about it, it really makes absolutely no
sense to build a project and wait until the very end to think about how
you are going to finish it. Doing a storyboard at the beginning
of the project, determining exactly how you will achieve the look
you’re after, is inherently logical. This simple lesson has made
an unbelievable difference in my woodworking.
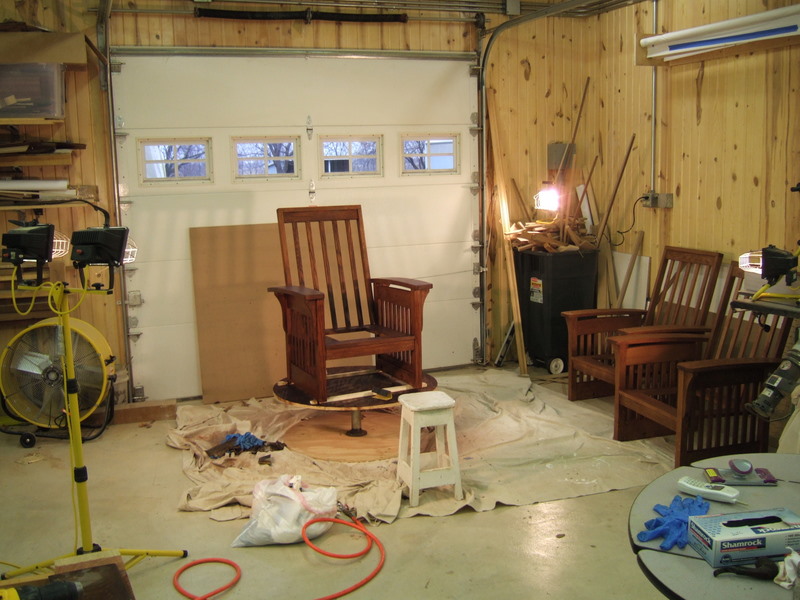
Finishing Environment
Good lighting is a critical factor when finishing a woodworking
project. I've collected several quartz halogen high intensity
lamps over the years that work very well for this application. My
shop is well lit with flourescent lighting but the extra light provided
by these lights really helps. I made a finishing table from
plywood that allows me to easily rotate the piece I'm working on.
This is a godsend for someone like me with bad knees because it allows
me to sit in one place and rotate the piece as needed. The
finishing table is simply two round 3/4" plywood disks that are
connected together using cast iron pipes. I purchased two 24"
long cast iron pipes, one 1 1/2 in and the other 2". The 1 1/2 in
pipe fits almost perfectly inside the 2" pipe, and by using the proper
pipe flange screwed to the top and bottom piece of plywood, the top
freely rotates. This system is very flexible by simply using
longer pipes to make the table higher or shorter pipes if the piece I'm
working on, like this chair, is taller.
Finishing Process
Step 1: Raise the grain in preparation for applying the finish.
This step is only necessary because I decided to use an alchohol and
water mixture for the dye stain I would be applying. If I was
using an alchohol dye, or an oil based stain, this step is not
needed. Using distilled water, I whetted the entire chair and
allowed it to dry. I used 320 grit sandpaper and very, very
lightly went over the entire surface. The idea is to gently knock
off the tiny nibs of wood raised by the application of the water.
Once you do this, you can apply water again and the grain will not be
raised.
Step 2: Apply the dye stain.
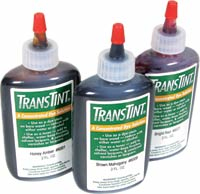
I
used a 50/50 mixture of distilled water and denatured alchohol, adding
enough transtint dye to create the proper tint. I worked out the
exact proportions when I made my story board and simply scaled the
proportions up to make a quart of dye. It took about ½ quart of
dye per chair. I applied the dye using a disposable spray
bottle. By spraying the dye over a small area, then using a rag
to evenly distrubute the dye, I gradually worked my way through
covering the entire chair. Note that I used a resperator while
spraying the dye because the vapor and mist created with this process
tends to hang in the air.
Step 3: Seal with Shellac
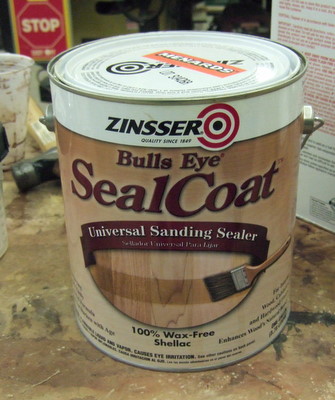
I
intended to apply an oil-based glaze over the dye, so it was critical
to seal the entire piece with a 1 pound cut coat of shellac.
There are many ways to apply shellac, and with only a 1 pound cut, it
is very easy to apply the shellac with a rag. The idea is to get
an even coat of shellac on the entire piece to create a separation
barrier between the dye and the subsequent coats. The great thing
about shellac is that it is almost universally compatible and can be
used as a sealer between incompatible finishes.
Step 4: Apply the glaze
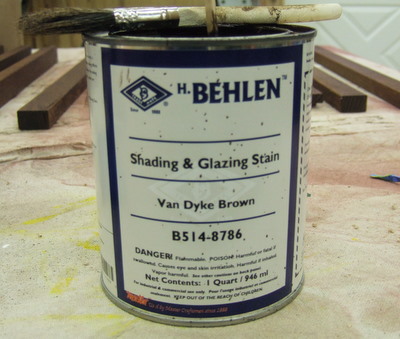
A
glaze is a colorant you apply over a sealed surface that drys very
slowly, works it way into the wood pours, but not into the more dense
surfaces of the wood. For the quartersawn white oak, the medulary
ray flecs are very dense compared to the rest of the wood, which is
usually described as being open pored. I wanted the glaze to
darken the open pours but not color the ray flecs. This effect is
simple to achieve because the glaze will find its way deep into the
open pores of the wood but can easily be wiped off the the ray
flecs. When applying a glaze of this type, you apply it very
liberally with a stiff brush, working it deep into the pores, then use
a rag to wipe off the excess glaze. An oil based glaze like the
one I used has a very long drying time which gives you plenty of time
to wipe off the excess glaze. Even if the glaze gets a bit too
dry to work, you can easily put a little solvent on the rag and
continue working. The glaze requires at least 24 hours to dry
before continuing with the next step.
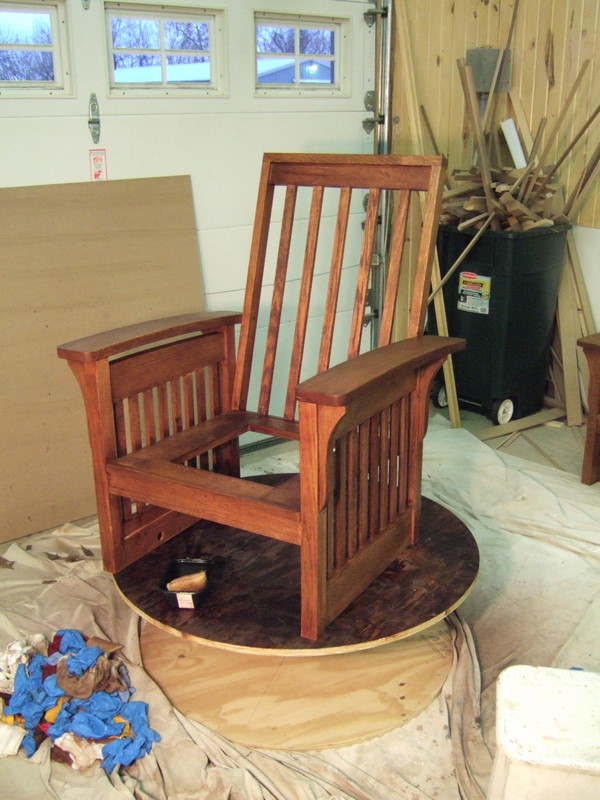
Step 4: Apply the top coats
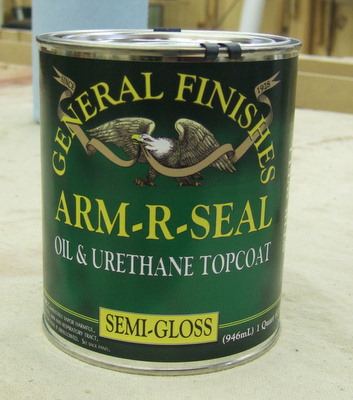
I
used a water-based wipe on top coat that I applied directly over the
glazed surface. Because the top coat uses a different solvent
than the glaze, I was able to apply it directly over the glaze.
If I had used an oil-based top coat instead, I might have chosen to
seal the glaze first with a thin coat of shellac. I applied the
top coat with a rag following the instructions on the can. I
applied a total of three coats sanding very lightly in between coats.

 I
intended to apply an oil-based glaze over the dye, so it was critical
to seal the entire piece with a 1 pound cut coat of shellac.
There are many ways to apply shellac, and with only a 1 pound cut, it
is very easy to apply the shellac with a rag. The idea is to get
an even coat of shellac on the entire piece to create a separation
barrier between the dye and the subsequent coats. The great thing
about shellac is that it is almost universally compatible and can be
used as a sealer between incompatible finishes.
I
intended to apply an oil-based glaze over the dye, so it was critical
to seal the entire piece with a 1 pound cut coat of shellac.
There are many ways to apply shellac, and with only a 1 pound cut, it
is very easy to apply the shellac with a rag. The idea is to get
an even coat of shellac on the entire piece to create a separation
barrier between the dye and the subsequent coats. The great thing
about shellac is that it is almost universally compatible and can be
used as a sealer between incompatible finishes.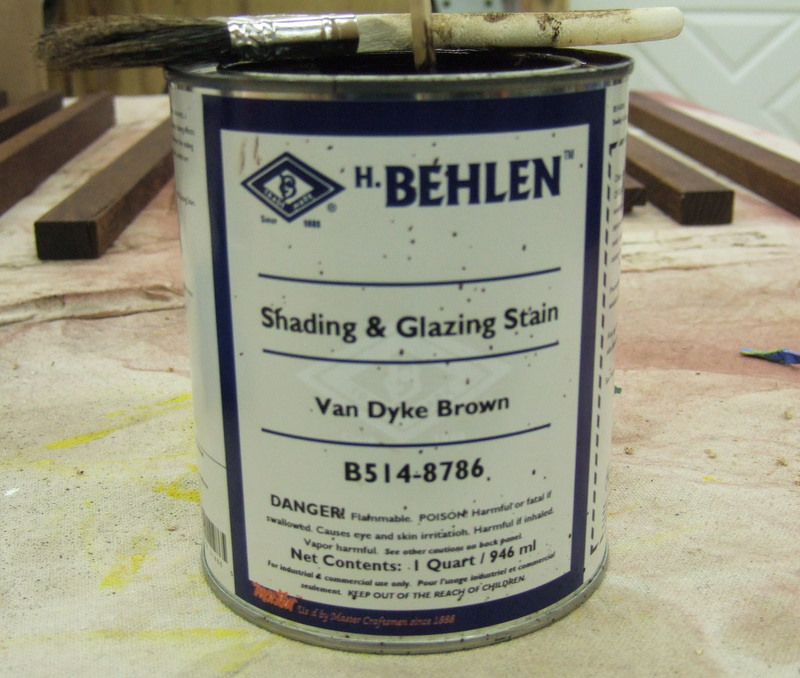 A
glaze is a colorant you apply over a sealed surface that drys very
slowly, works it way into the wood pours, but not into the more dense
surfaces of the wood. For the quartersawn white oak, the medulary
ray flecs are very dense compared to the rest of the wood, which is
usually described as being open pored. I wanted the glaze to
darken the open pours but not color the ray flecs. This effect is
simple to achieve because the glaze will find its way deep into the
open pores of the wood but can easily be wiped off the the ray
flecs. When applying a glaze of this type, you apply it very
liberally with a stiff brush, working it deep into the pores, then use
a rag to wipe off the excess glaze. An oil based glaze like the
one I used has a very long drying time which gives you plenty of time
to wipe off the excess glaze. Even if the glaze gets a bit too
dry to work, you can easily put a little solvent on the rag and
continue working. The glaze requires at least 24 hours to dry
before continuing with the next step.
A
glaze is a colorant you apply over a sealed surface that drys very
slowly, works it way into the wood pours, but not into the more dense
surfaces of the wood. For the quartersawn white oak, the medulary
ray flecs are very dense compared to the rest of the wood, which is
usually described as being open pored. I wanted the glaze to
darken the open pours but not color the ray flecs. This effect is
simple to achieve because the glaze will find its way deep into the
open pores of the wood but can easily be wiped off the the ray
flecs. When applying a glaze of this type, you apply it very
liberally with a stiff brush, working it deep into the pores, then use
a rag to wipe off the excess glaze. An oil based glaze like the
one I used has a very long drying time which gives you plenty of time
to wipe off the excess glaze. Even if the glaze gets a bit too
dry to work, you can easily put a little solvent on the rag and
continue working. The glaze requires at least 24 hours to dry
before continuing with the next step. I
used a water-based wipe on top coat that I applied directly over the
glazed surface. Because the top coat uses a different solvent
than the glaze, I was able to apply it directly over the glaze.
If I had used an oil-based top coat instead, I might have chosen to
seal the glaze first with a thin coat of shellac. I applied the
top coat with a rag following the instructions on the can. I
applied a total of three coats sanding very lightly in between coats.
I
used a water-based wipe on top coat that I applied directly over the
glazed surface. Because the top coat uses a different solvent
than the glaze, I was able to apply it directly over the glaze.
If I had used an oil-based top coat instead, I might have chosen to
seal the glaze first with a thin coat of shellac. I applied the
top coat with a rag following the instructions on the can. I
applied a total of three coats sanding very lightly in between coats.