 |
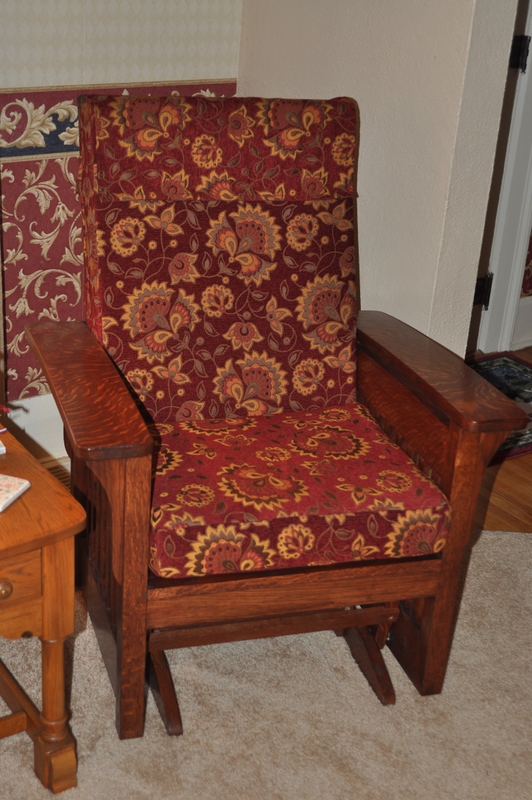
This "glider rocker" is made entirely from
quartersawn white oak and finished in a traditional mission-style arts
and craft finish. During the summer of 2010 I made five of these
rockers, one for myself and the other four for friends of mine.
Making five of anything this complex was quite an undertaking. I have settled into a consistent routine for each woodworking project I do. First, I made a detailed full size drawing, then from the drawing I created templates for the pieces that had a curved element. It might surprise you to know that I spend a great deal of time creating the full size drawing. This chair was too complex for a single drawing, so I made two, one for the upper chair assembly and a second for the lower rocker assembly. Next I made the various forms and jigs I would need to build the chair. The assembly process involved breaking the project down into logical elements, and rough cutting the material for each element. I do this for all the elements in a project, then set each group of rough cut material aside until the time comes to cut the material to final dimensions. |
 |
This
picture shows the spectacular effect you can get from quartersawn white
oak finished according to a finishing schedule I describe in detail
here. A friend of mine's daughter made the cushions from
upolstery material we selected at a fabric store. The design of
the chair takes into account a four inch fabric cushion for both the
seat the the back. |
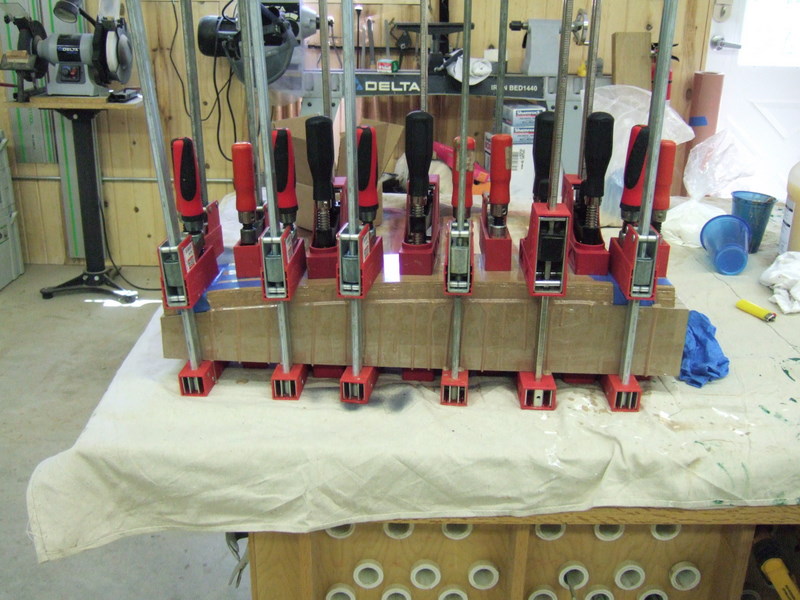 |
The
armrest is laminated over a form from eight laminations each 1/8"
thick. The form was made directly from the template I took off
the drawing. I used the template as a pattern and using a pattern
bit on the router table I laminated enough pieces of 3/4" MDF to make
the form you see here. I used Unibond 800
glue which is fantistic for creating glued up laminations that
absolutely hold their shape when after you remove them from the
form. The form is completely covered with packing tape to prevent
the glue from sticking to the form. I also covered the top of the
top lamination and the bottom of the bottom lamination with packing
tape prior to glue up. Since the top lamination's quartersawn
look is a featured design element it was critical that I keep any glue
from touching this surface. |
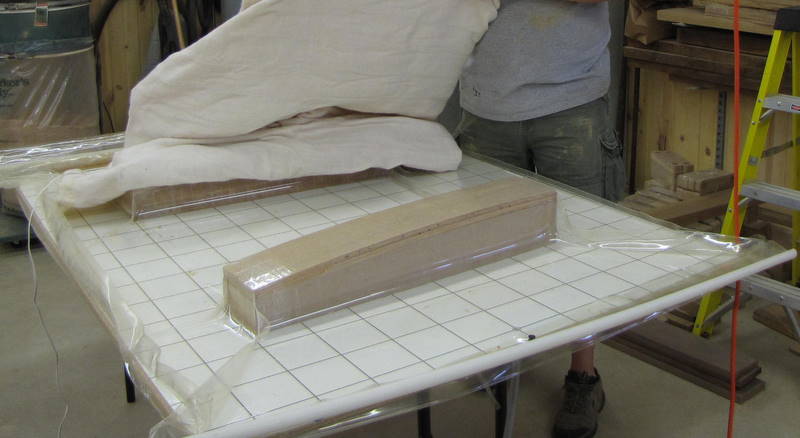 |
After the prototype I made a second form and setup my vacuum press to allow me to make two arm rests at a time. |
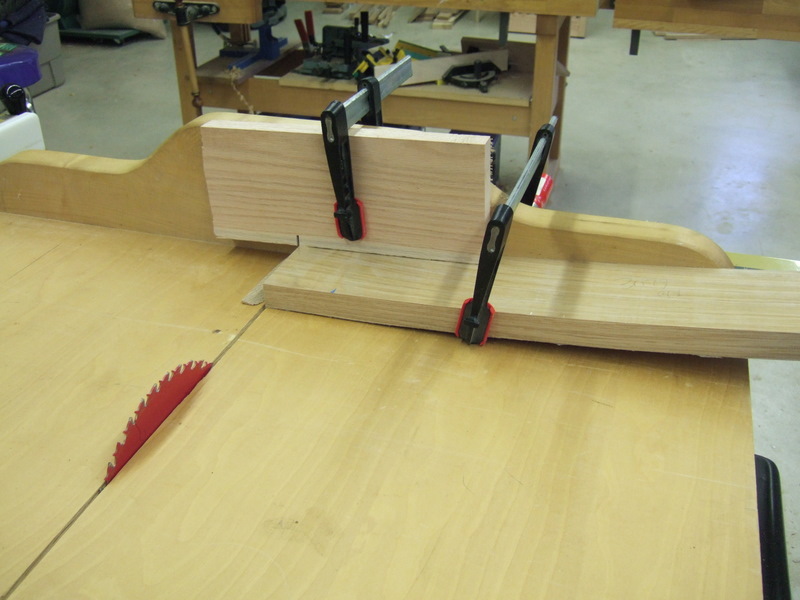 |
Squaring off each end of the
laminated arm rest was tricky. I used my squaring sled as you see
here to accomplish this. Notice that I clamped a piece of scrap
to tightly hold the arm rest to the sled. For safety it is
critical that the arm rest be completely secure before attempting the
cut. |
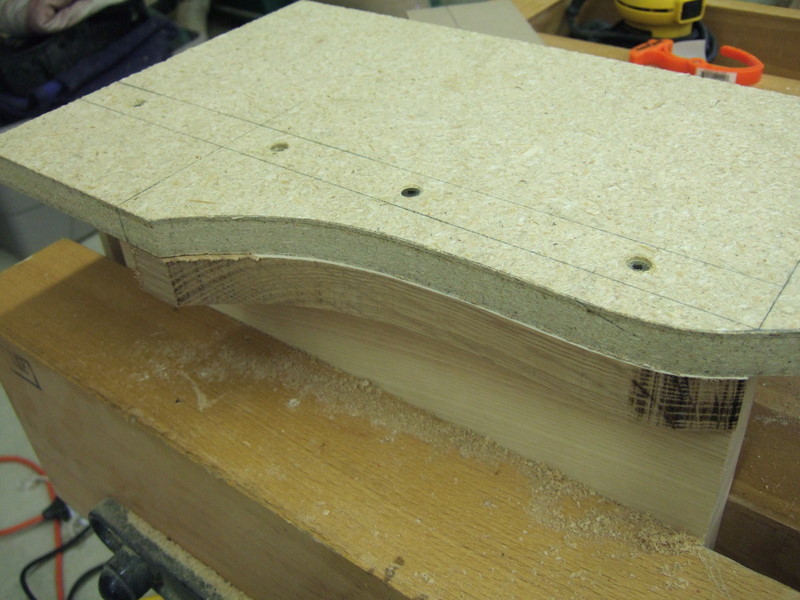 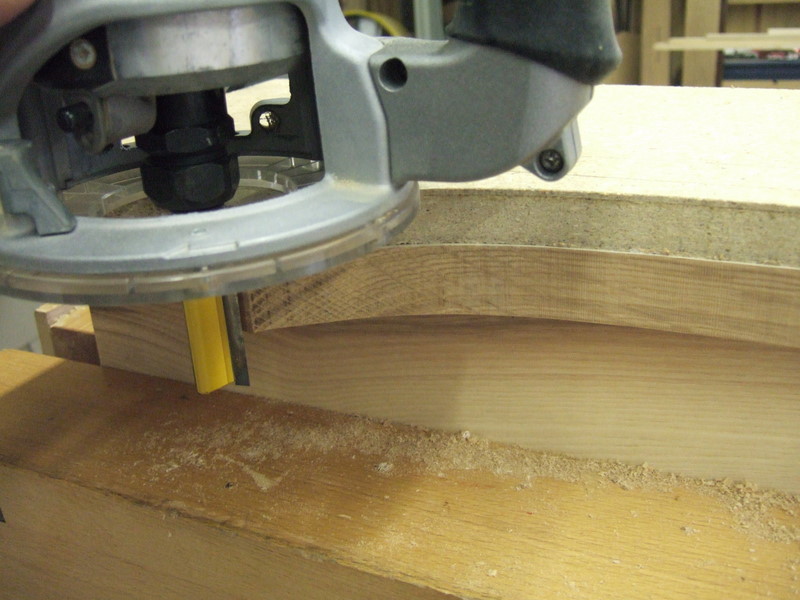  |
This series of pictures shows
the jig I made to pattern route the corbels that fit under the
armrests. I used a pattern taken directly from the full sized
drawing to create a template that I used to create this jig. The
template was used to draw the basic shape on the stock that was then
bandsawn leaving material outside the line. The bandsawn corbel
is then screwed to the form from the back and a pattern router bit is
used to trim the excess wood from the corbel. |
 |
Here is a picture of the
chair back prior to assembly. I used my Festool Domino machine to
cut all the mortises you see here. Assembly is just a matter of
glue and some clamps. |
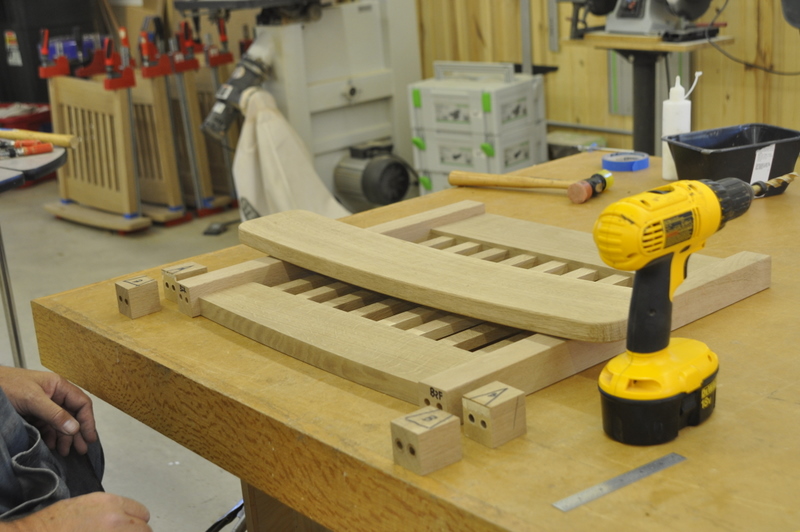 |
One of the more interesting
problems to solve in building this chair is how to attach the armrest
to the side. The armrest is curved slightly along its length, and
the vertical members of the side are cut to the appropriate angle to
match the curve of the armrest. The challenge is drilling holes
for dowels that are perfectly aligned and that enter the curved arm
rest in such a way as to allow the dowel to go straight into the hole
in the arm rest. In other words, the hole in the armrest had to
be in exact alignment with the hole in the side so the two would mate
correctly. I solved this problem by making two sets of matching blocks that you see in this picture. |
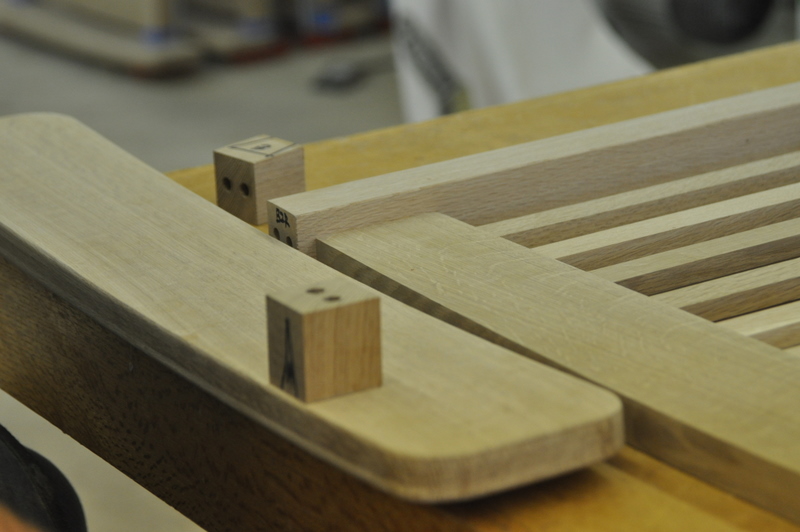 |
To make these drilling guide
blocks, I used some extra leg stock that perfectly matched the legs and
cut the stock to about 4 inches long. On the drill press I
drilled the two holes through the 4 inch stock you see here. Then
I drew the triangle on the stock you see in the picture then cut the
stock in half with the angle of the cut matching the angle where the
leg will meet the armrest. I also glued sandpaper on each surface
that would mate against the corresponding surface in which I had to
drill a hole for the dowel. |
 |
Now it is a simple matter of
clamping the block onto the workpiece with the sandpapered surface
against the workpiece, then using a 3/8 drill with a stop to drill the
hole into the armrest. |
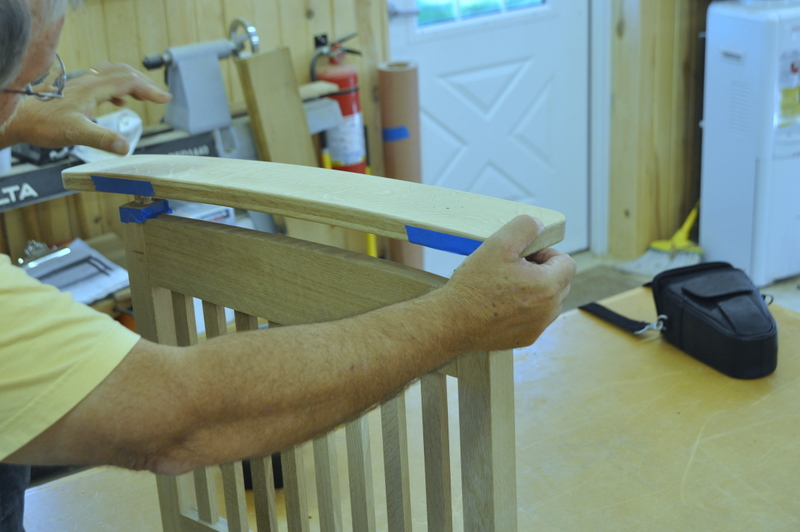 |
Here you see me attaching the
curved armrest to the chair side. I've already glued the dowels
into the legs and am lining up the holes in the bottom of the arm rest
with the dowels. |
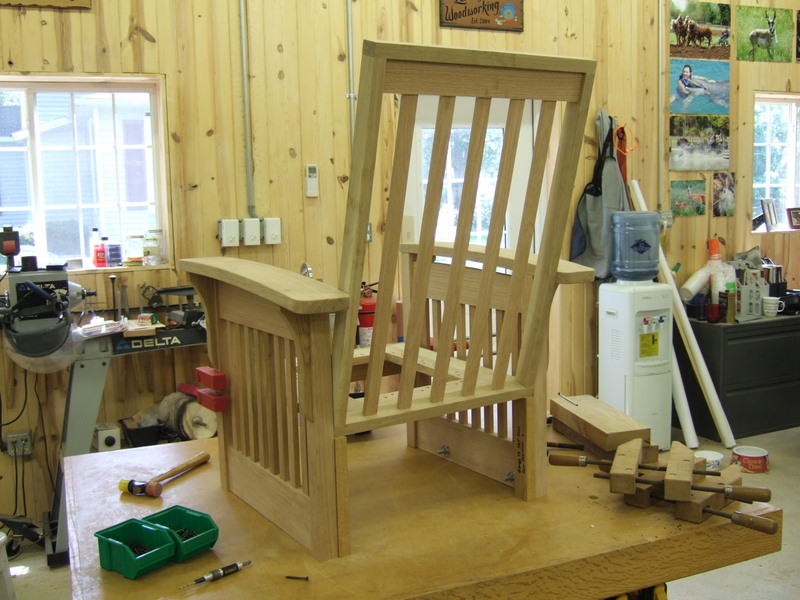 |
Here
is a picture of the partially assembled chair. The back and seat
were made as one unit that was set into the two arm units that were
connected together with a front stretcher. If you look closely at
the bottom you can see the bearings pressed into the sides. A
total of eight bearings are used to construct the rocking
mechanism. |
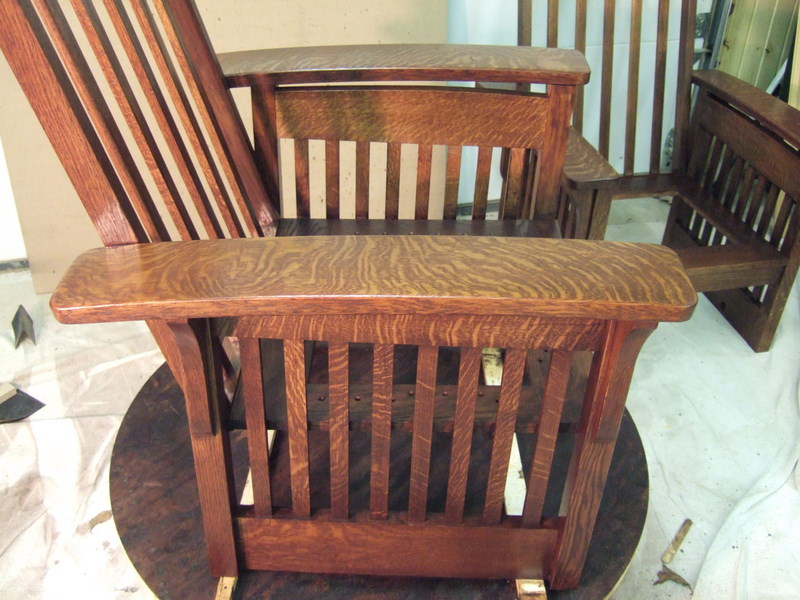 |
Here is a good picture that
shows the spectacular medulary ray flec pattern of the quartersawn
white oak. This shot is of one of the five chairs I built that
was in the process of receiving its finish. If you are
interested in a detailed explaination of the finishing process I used
to get this effect you can click on this link. |