 |
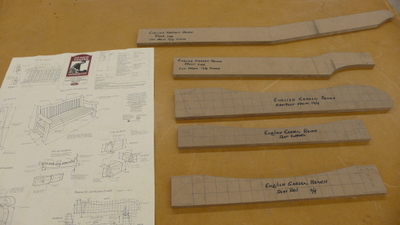
This
project is all about making templates and I took a lot of time to make
the templates as accurate as possible. The technique I use is
to
use the templates to rough out the shape on the bandsaw and then make
an exact copy on the router table using a pattern bit. This
technique makes it possible to produce as many copies of a particular
piece as I need and they will all be exactly the same. |
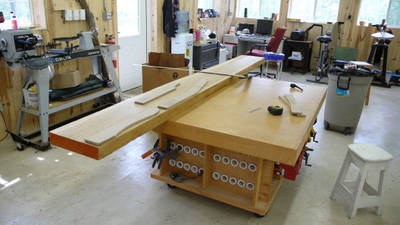 |
The
templates also come in very handy to help get as much yield out of an
expensive piece of wood . Here I'm using the templates to
figure
out where each piece will come out of the board. |
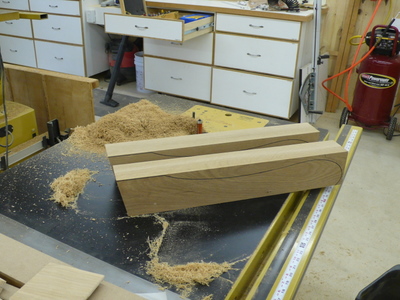 |
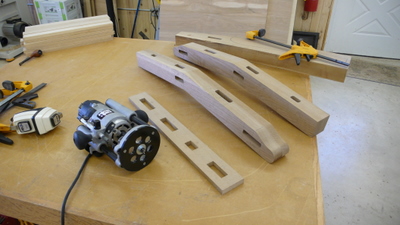
Here
the two arms have been rough cut. The critical angle on the
left
of each arm had to be precise or else the arms would not have parallel
with the ground when attached to the backs. After this cut
was
made on the table saw I used a bandsaw to rough out the curved cuts
staying well away from the line. |
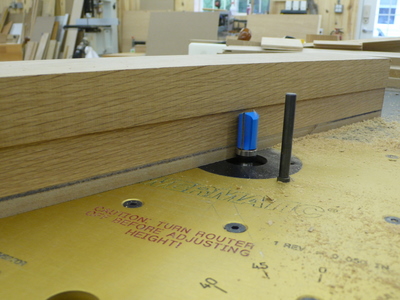 |
Here
I'm using a pattern bit on my router table to refine the shape exactly
to the template. The 1/2 inch MDF template has been attached
to
the workpiece using double sided tape. The hight of the
router
bit is set so that the bearing rides along the template and the bit
cuts the wood. Because this stock is 12/4 (e.g.: 3 inches
thick)
the bit I'm using can only do half the profile. After this
step
is complete, I used another pattern bit with the bearing on the top,
removed the MDF template, then finished the cut by referencing the
bearing against the part finished in this step. The result is
a
three inch piece cut to the exact shape of the template. |
 |
The
mortises needed to be cut an inch and a half deep and were 3/4 inches
wide. There are many ways to cut mortises and for these I
chose
to make another template for the four different mortise lengths I would
be cutting. The size of each hole is adjusted to accomodate
the
guide bushing I've installed on the router and also considers the
diameter of the router bit. The advantage of this technique
was
that I was able to very precisely position the template on the work
piece to locate the mortise as accurate as possible. The
disadvantage is that I ended up with rounded corners that I had to
chisel square so the tenons would fit properly. |
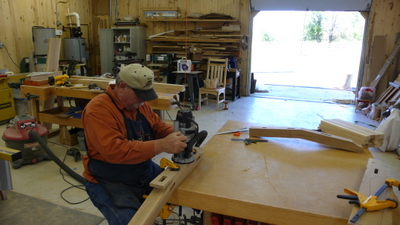 |
Here I'm using the template I describe above to
cut one of the mortises. |
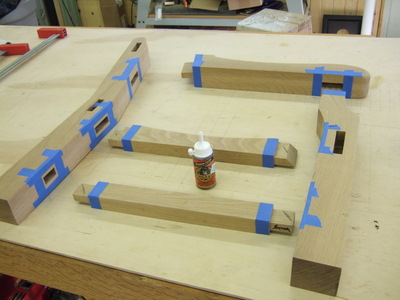 |
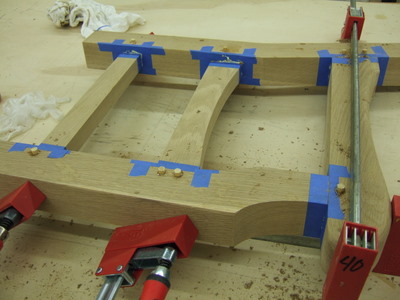
Polyurathane
glue has excellent outdoor properties so it was the natural choice.
It is, however, a very messy glue and it is very difficult to
clean any squeeze out. During the dry fit I clamped the
assembly
together and applied blue tape to the joints. This technique
catches 99% of the glue squeeze out. |
 |
After
glueing and clamping, I drilled 3/8 inch holes into and through each
tenon, applied some glue, then drove in 3/8 inch birch dowels.
This is called "pegging the tenon" and this technique has
been
used for hundreds of years to added incredible strength to a mortise
and tenon joint. After the pegs were inserted, the clamps
were no
longer needed. |
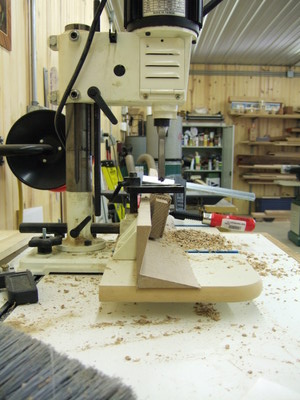 |
Here I've setup my hollow chisel mortise machine
to cut the angled mortises for the slats along the bottom back rail.
|
 |
Here
I've setup to cut the cheeks on the tenons on one of the back members.
I needed every bit of my 10 foot ceiling height to pull this
off. |
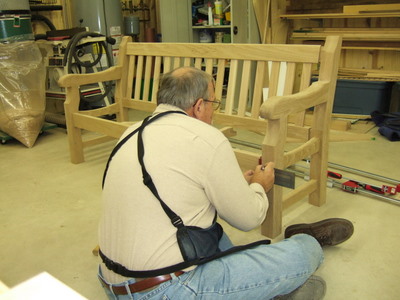 |
At the dry fit stage before glue I'm laying out
exactly where I want the pegs to go to peg the tenons. |
 |
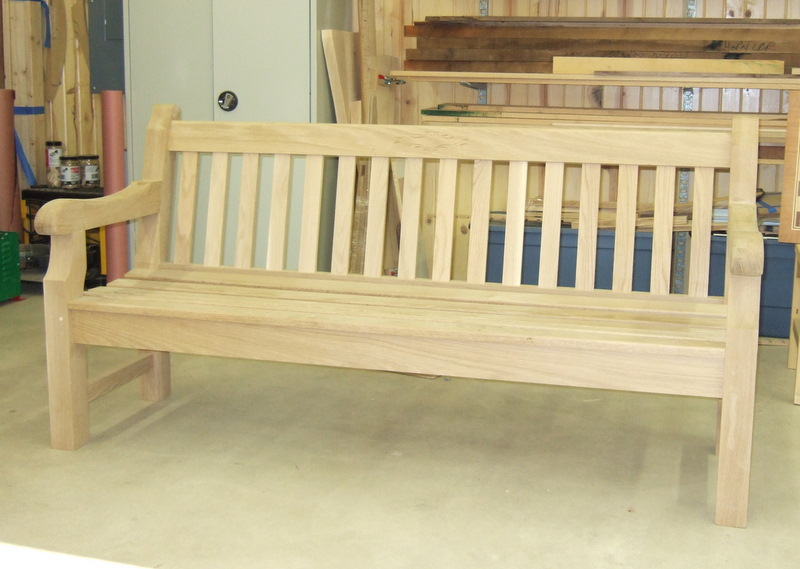
The woodworking is complete and its time to enjoy
a cup and reflect on a really fun project! |