 |
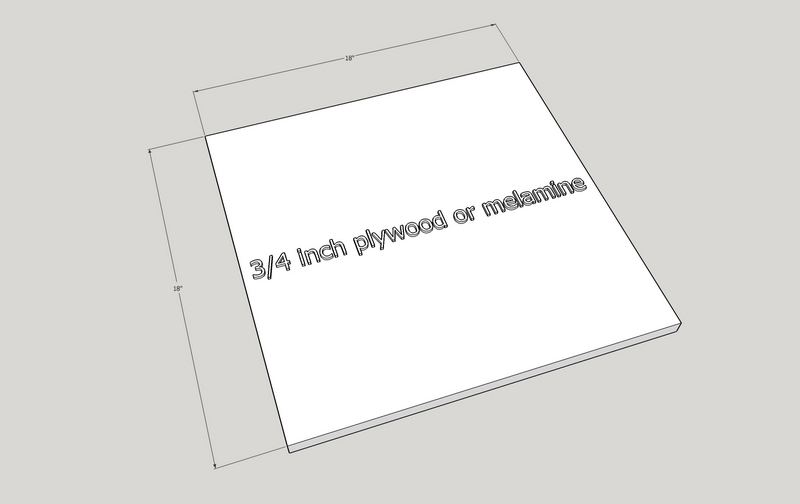
The jig starts with a base made either from high quality
plywood or melamine. In this particular example I'm
making a base that is 18 inches square. The size of
the base will effectively determine the size of the
ellipse or oval that you can create. Once you
understand the basic principle you can scale this either
larger or smaller depending on your needs. Also note
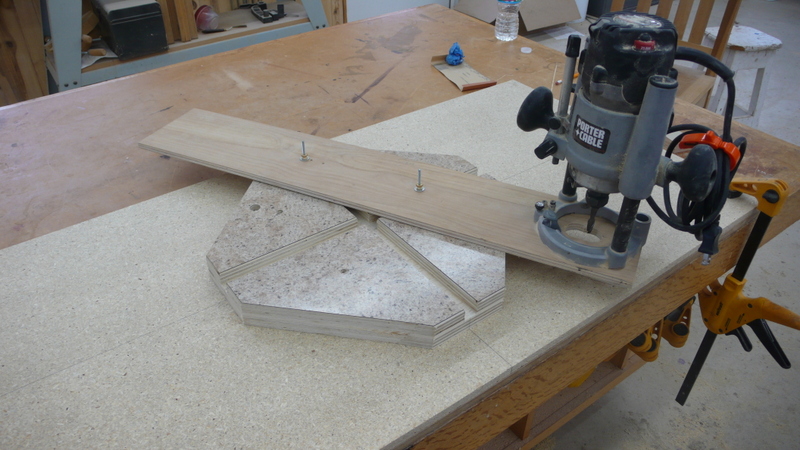
that in the actual jig I created in the photo above I
clipped the corners to facilitate travel of the router
around the jig. This may or may not be necessary,
again depending upon the size of the jig you end up
with. For simplicity I'm not showing the clipped
corners in this general discussion on how to make one of
these. |
 |
The next step is to make
and attach four quads that are attached on top of the base
as shown. You can also make these out of the same
material as the base. The quads are sized such that
a 3/4 inch track is created running as shown in the
picture. You'll end up with a track that is 3/4 inch
wide and 3/4 inch deep running in both directions.
These will act as guides for the runners that I'll explain
in the next step. |
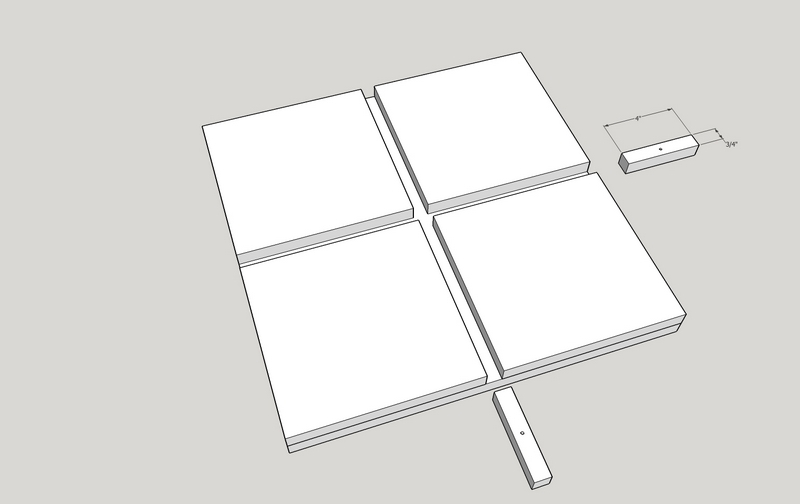 |
Two slides are created
to precisely fit into the tracks created by the
quads. These slides must be slightly less than 3/4
inch thick so they will float just above the plywood
base. Their width must be just slightly less than
the width of the tracks to allow them to easily slide thru
the tracks, yet not allow any significant slop. In
this particular case, I made these 4 inches long and
drilled a hole in the center of each slide. I waxed
both the slides and tracks to allow the slides to easily
move thru the tracks. |
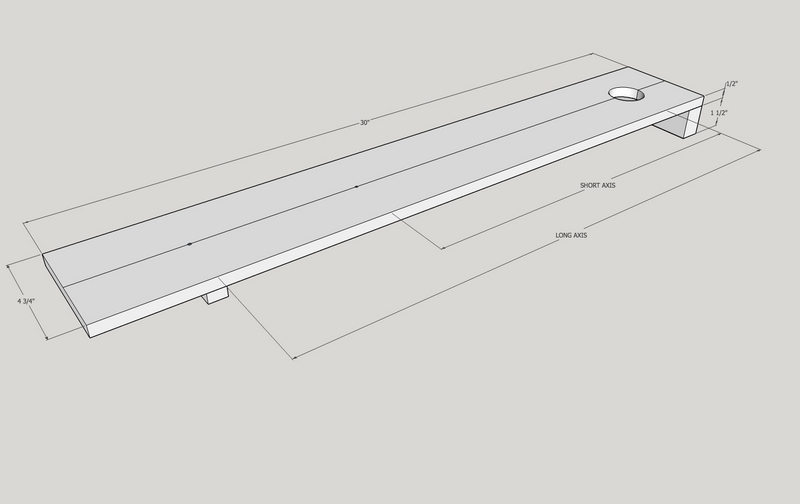 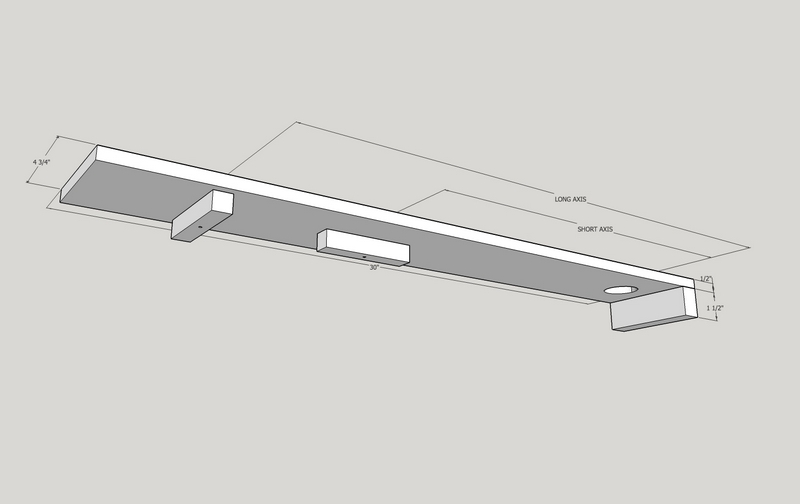 |
Next you will make a
"router carrier" that will hold your router as the carrier
is rotated around the base. The precise dimensions
of the router carrier will vary depending on the ellipse
you're trying to create. In this example the carrier
is 4 3/4 inches wide by 30 inches long and is made from
1/2 inch plywood. Making the carrier out of 1/2 in
material makes it easier for the router bit to protrude
enough such that it is able to penetrate the work piece
you'll be cutting the oval in. Note that two holes
are drilled in the carrier to which you'll attach the
slides. I used a machine screw that I inserted from
the bottom of each slide. I drilled a larger hole in
the bottom of each slide to allow the screw head to be
buried in the slide so it would not interfere with the
motion of the slide thru the tracks. Attach the
other end of the screw just tight enough to hold the
slides to the carrier, but allow each slide to move and
rotate. The distance that you drill the holes in the carrier are with respect to the edge of the router bit. Take the major and minor axis of the ellipse you want to create, and divide each of these measurements in half. Drill the holes in the carrier along the center line of the carrier that distance from where the edge of the router bit will contact the work piece, then attach the slides. |
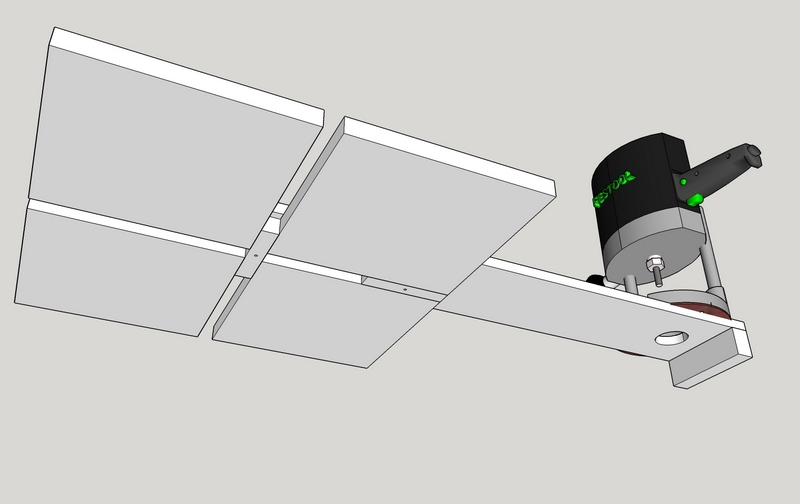 |
Here is an imaginary
view of the jig with the base removed. It is shown
at the position that represents the major axis. As
the router is moved around the jig, the slides will cause
the router bit to cut a perfect oval or ellipse in the
work piece. |
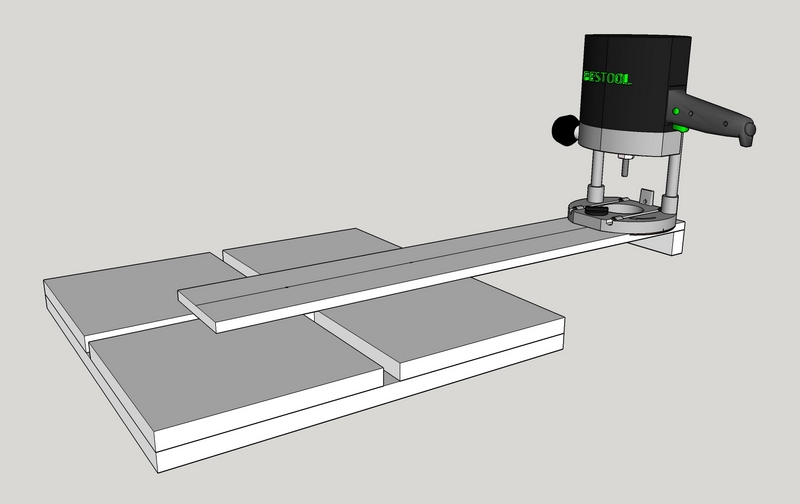 |
Here is the completed
jig with the router attached. Note that I've
attached a block to the end of the router carrier that
keeps the router-end of the carrier above the work piece
surface that same height as the jig itself. Please note that all the dimensions I've shown are arbitrary and you can scale dimensions for your jig larger or smaller depending upon the size of the ellipse you want to create. There really is no substitute for simply building one of these and experimenting with it yourself. I've been able to make a couple of different sized bases using the same router carrier to make different sizes of ellipses. You can simply drill new holes in the carrier to match the axis dimensions of different ellipses. |