 |
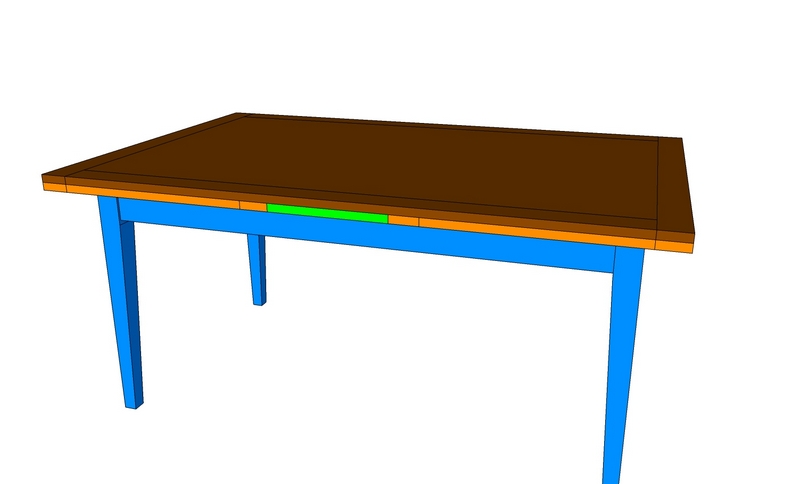
Here is a color coded image of the table that I will use
to explain the basic operation. Notice first that
there are two tops, an upper top in dark brown that is the
actual table top, and a second top under the first that
consists of three sectons: a middle section in green
and two draw leaves at either end in light brown. |
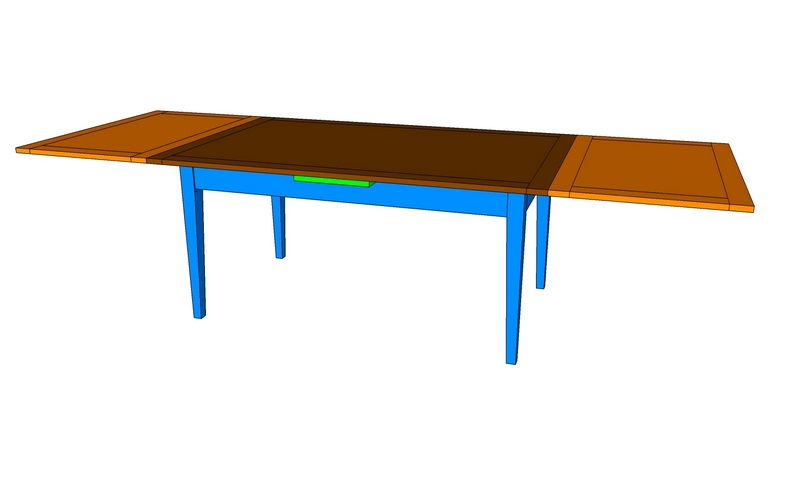 |
The table with both draw
leafs in the extended position. Notice the key
element of this design is that as each leaf is extended,
when it reaches the end of its travel, it snaps into a
position that is exactly level with the actual table top,
effectively extending the length of the top. In
effect, each draw leaf must rise along a ramp system the
thickness of the table top such that when it reaches the
end of its travel along the ramp each leaf is at the same
level of the top. This is the key to the tables
operation and I'll explain more about how this works a bit
later. |
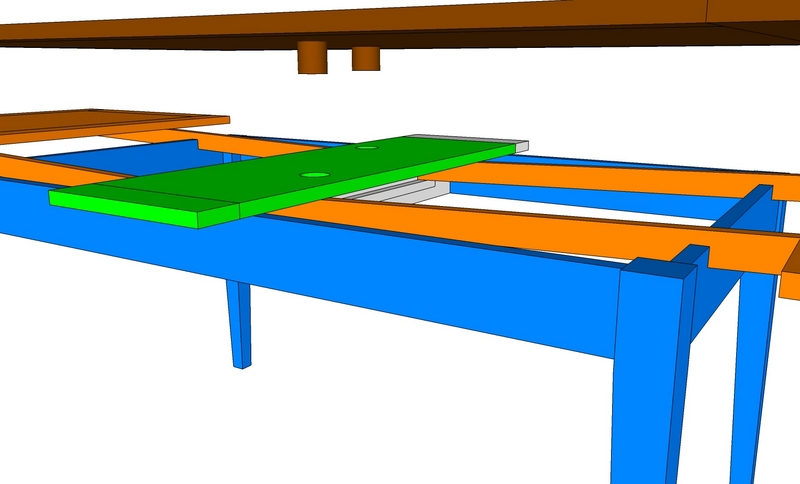 |
One of the key reasons
this can work is that the top actually floats on the table
and is held in position by two pegs you can see
here. The pegs in the table top are not really drawn
to scale. In actual practice, I used pegs that were
1.25 inch in diameter. The holes in the center
section are actually slightly larger in diameter.
The fit of the pegs into the holes is key because they
both must hold the table somewhat firmly in position, yet
allow the top at either end to rise as either leaf is
pulled out. When the leaf reaches its fully extended
position, it is the top that snaps back down as the leaf
is extended past and no longer supports the top. |
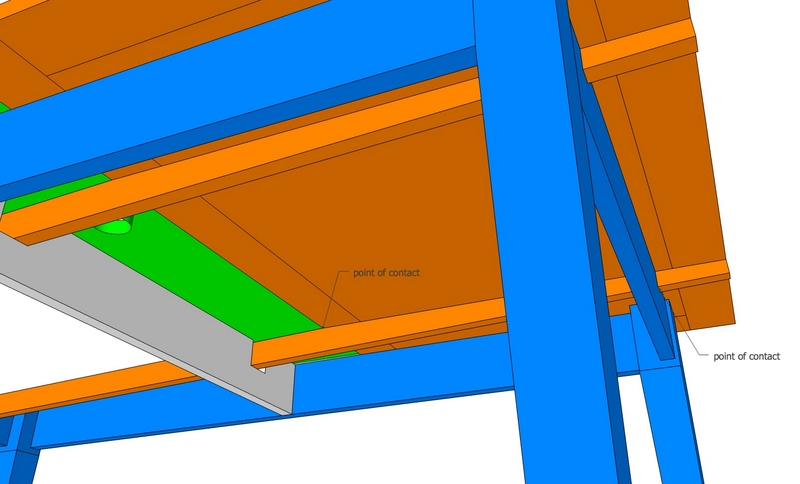 |
There are several things
of note in this picture. First, notice that the
slide changes thickness from about 2 inches toward the
middle to slightly less than 3/4 inch when it reaches the
end of the leaf. This change in dimension forms the
"ramp" that allows the leaf to rise as it is pulled
out. Second, notice that there are two points of contact that the ramp makes with the table base. On the fixed center leaf, the ramp contacts the leaf at the point shown. Note that it does not make contact in the notch that is cut thru the center brace thru which it passes. The notch in the center is more of a side-to-side guide. Note that the other place the ramp contacts the table at the bottom of the notch cut into the apron. The depth of the notch in the apron must be extremely precise because that depth, along with the thickness of the ramp at the point of contact, are what establishes the height that the leaf will rise when it if fully extende or fully inserted. |
 |
Here is an exerpt from
my shop drawings that shows the particular dimensions from
the table I built. |
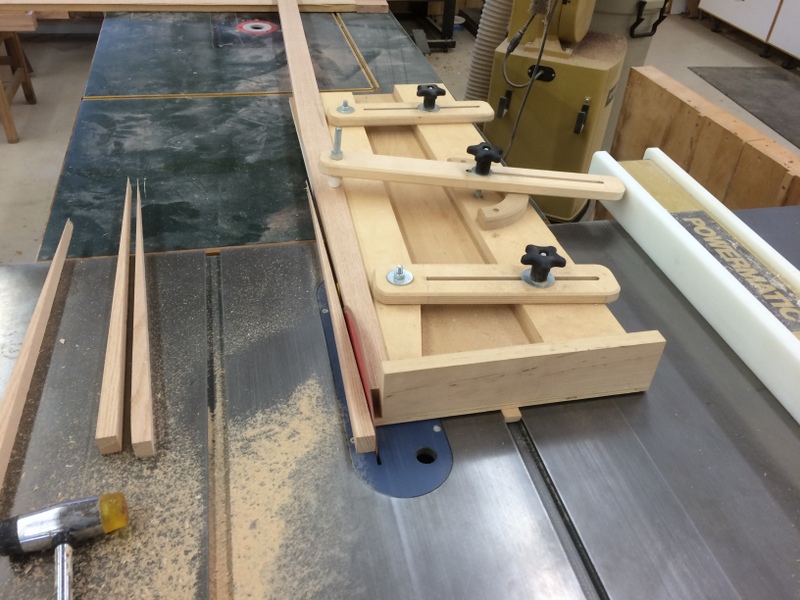 |
I used my tapering jig to cut the angle
for the slider ramps. This was an extremely fussy
cut that had to be dead-on to also match the depth of the
notch in the apron so the leaf would be positioned at
exactly the same height as the main table top when the
leaf is fully extended. |
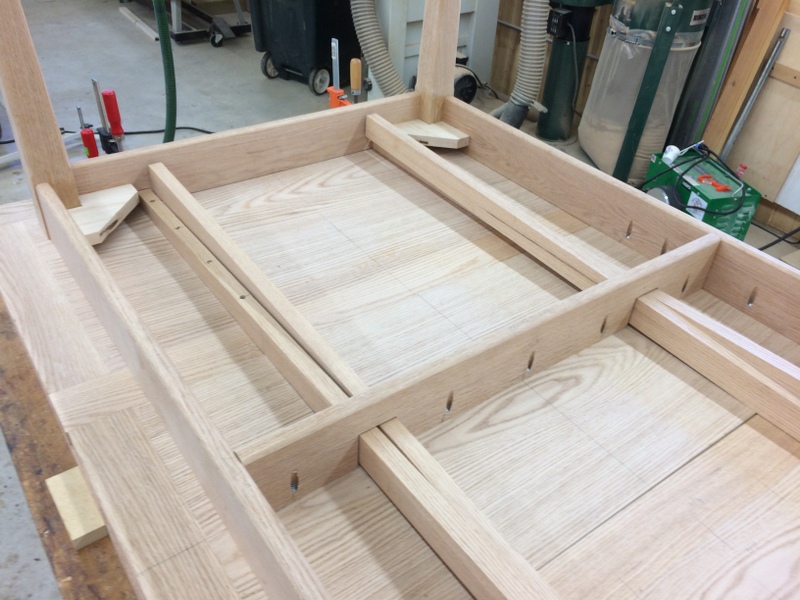  |
Here are a couple of pictures showing
how the slides attach to the leafs and pass thru notches
cut into either apron as well as a center divider.
There is enough room in the center divider to allow the
slides to easily pass past each other, but not so much as
to allow the slides to rack as they are moved in and out. The second picture shows how the slides are secured to the leafs using screws and glue. If you look carefully at the bottom image, you'll note that the slide extends to the end of the leaf. Later, I trimmed the slide so it only sticks past the apron by about an inch, but during fitup, I left it long. One other important thing that is not shown is a stop that I fabricated to not allow the slides to extend too far. I made a couple of stop blocks that were screwed to the slides that prevent them from passing completely thru the center apron. |
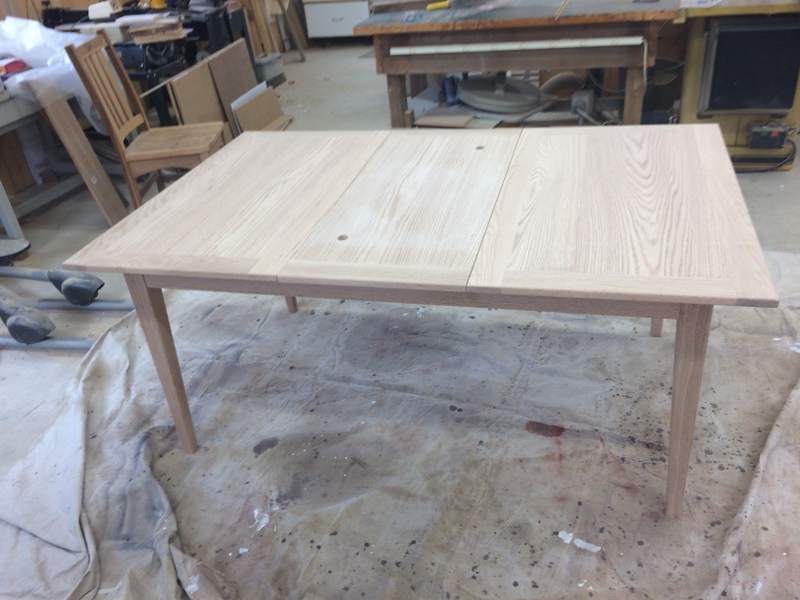 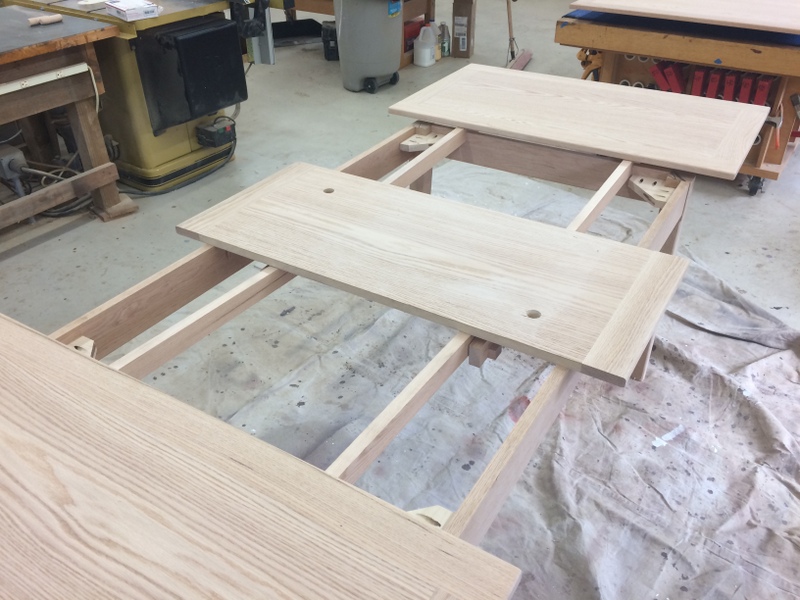 |
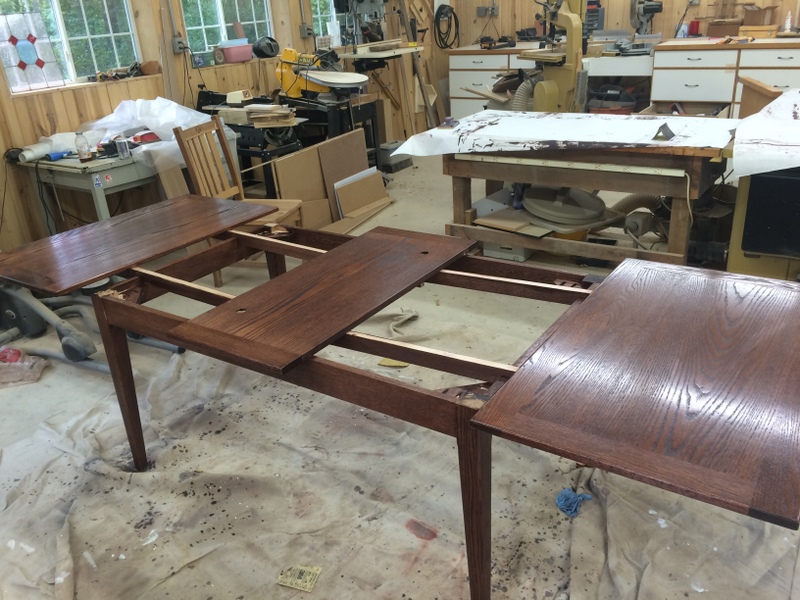
Here is the table just prior to
staining. These pictures show the two alignment
holes in the center section. Also note that in the
bottom picture, the leaves are fully extended. Had
the top been in place, both leafs would have risen to be
in exact vertical alignment with the top. |
 |
After finishing and almost ready to go
out the door. It's difficult to see, but you'll
notice that the top of each slide appears to be
unfinished. That's because I've installed a thin,
low friction UHMW tape to these surfaces to allow the
mechanism to work with as little friction as
possible. I don't have a picture that shows it, but I also installed several strips of UHMW tape to the bottom of the top itself. As the leafs are pulled out, these strips effetively lift the top very slightly above the leaf so there is no wood to wood contact. |