
|
The
basic idea is to create a circular frame with two ledges. One
ledge, the lowest, will hold the art work. The upper ledge will
hold a 1/4" plywood circular keeper that will be secured from the rear
with wood screws, capturing the glass art in a wooden sandwich. |

|
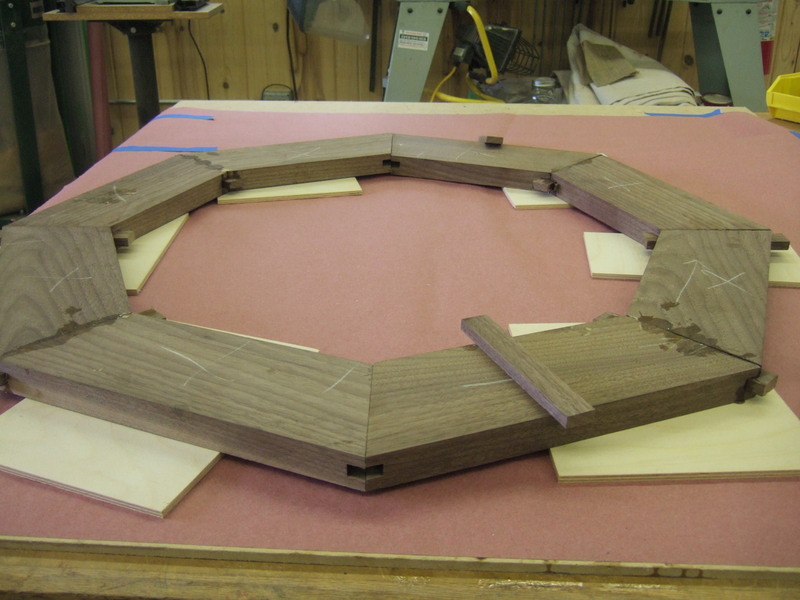
How
do you turn a straight piece of lumber into a circle? In this
case, I glued up eight segments using splines to create the shape you
see, then using my router with a circle cutting guide, I exracted the
circular frame. |
|
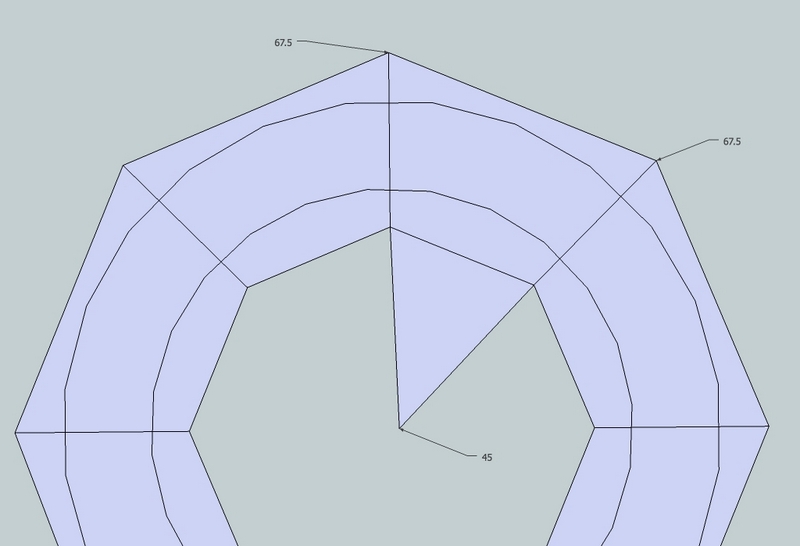
A
circle is divided into 360 degrees. If I want to cut the circle
into eight equal pieces, each piece will have a 45 degree angle as
shown. To cut the angles out of each straight piece. I needed to
set my miter saw to 67.5 degrees (or its compliment 22.5 degrees.) |

|
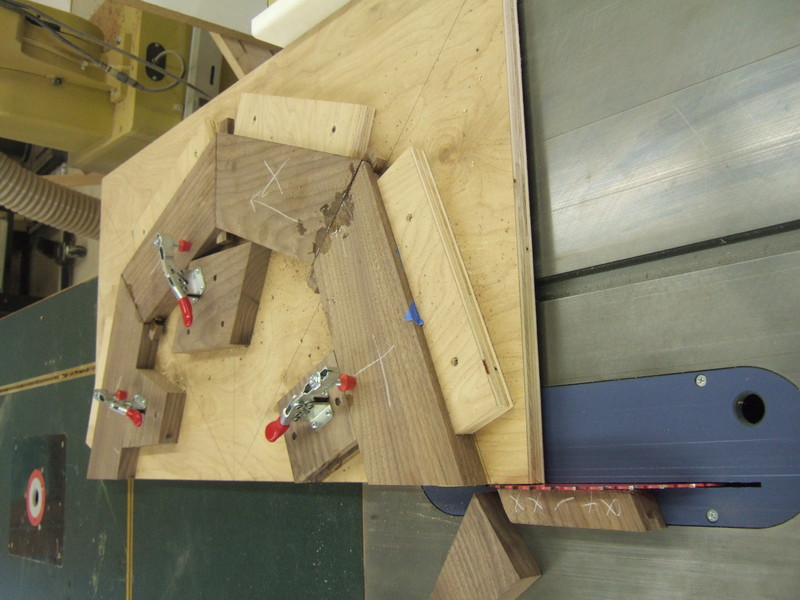
Here is the stained glass artist getting a woodworking lesson! We put a 1/4" box joint blade set in the table saw and adjusted the tenon cutting jig to cut half the spline joint in the center. Because it is virtually impossible to make this adjustment precise, we marked each piece with a reference mark then always placed the reference mark agains the fence of the tenon cutting jig. |
|
Here
you can get an idea how the splines work. Because it was nearly
impossible to clamp this, I used hide glue that has a very strong tack
and slow setting time. This allowed me to press the joint
together by hand and set it aside to dry. As long as you press it
for three or four minutes, the tack strength of the hide glue does a
good job holding the joint closed. Of course, it would have been
preferable to clamp each joint, but this technique worked great. |
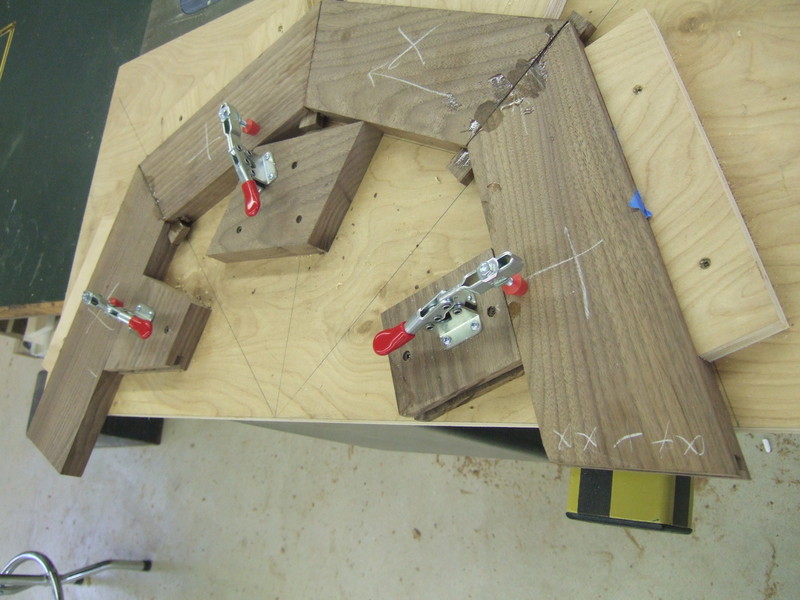  |
No matter how accurate you think
your miter saw is, the reality is that each angled cut will introduce a
tiny amount of error. Multiply an error even as small as 1/10 of
a degree, over 8 joints, times two angle cuts per joint, results in a
cumulative error of 16 * 1/10 degree, or 1.6 degrees of error.
That will make it impossible to completely close all the joints. The solution to this problem is to make the final glueup out of two halves, then use a jig like I show here to trim each half to be perfect. This jig took an hour or so to build, and was used for only two cuts, but allowed me to create perfect joints. Each half is trimmed as you see, then both halves have splines cut as I showed above. |
 |
Cutting the splines in each half
could not be done with the tenoning jig. I had a fence laying
around that fits over my table saw fence. By securely clamping
each half to this fence, I was able to secure the object so it could
safely be passed over the dado blade. |
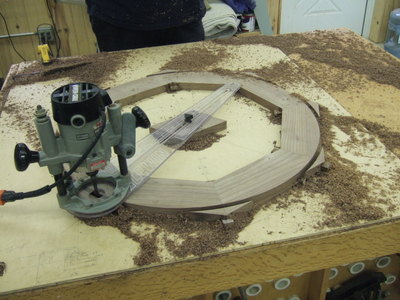 |
Now that the glueup is complete
and sanded, I can go to work with my router and a circle-cutting
guide. Starting at the outside, I cut the outside diameter first,
then the inside diameter, then the ledge for the glass art, and finally
the edge for the plywood keeper. |
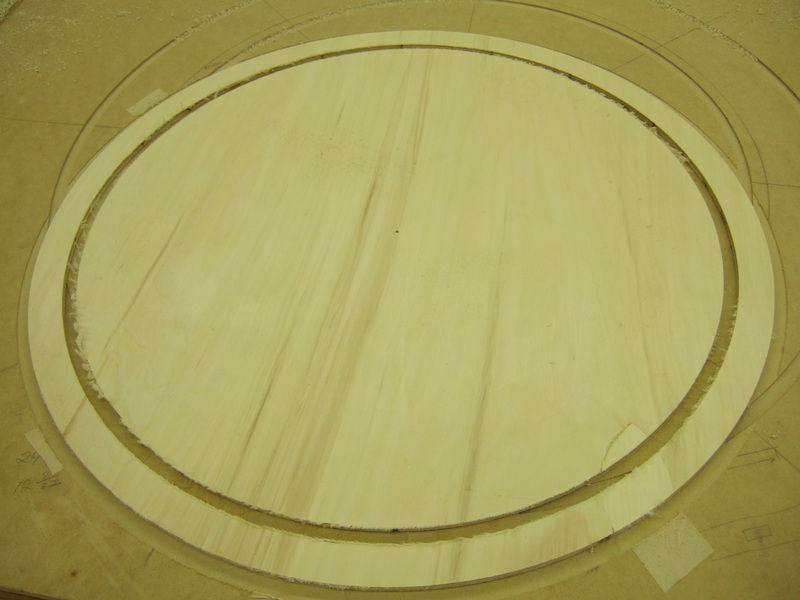 |
Here I've used my router and
circle cutting jig to cut a plywood ring out of 1/4 inch plywood.
The outside and inside diameters of the ring match exactly the recess I
created in the fram. |
|
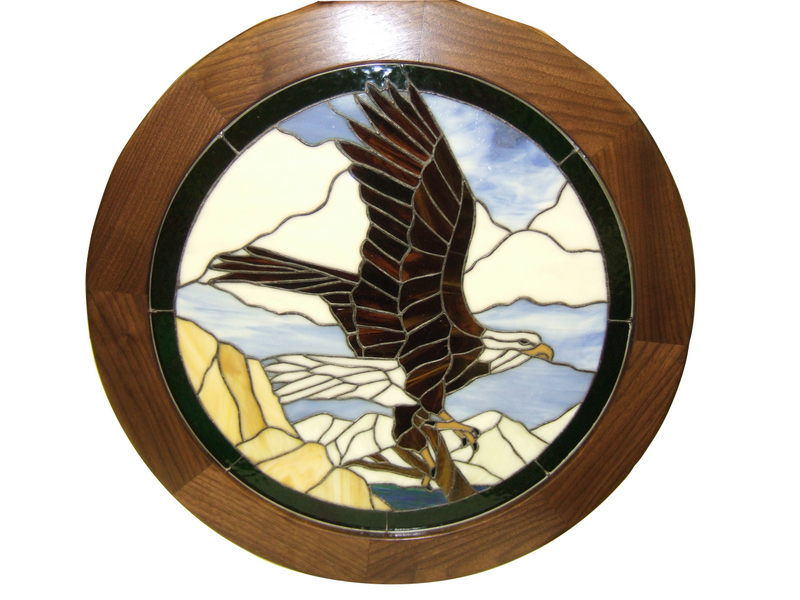
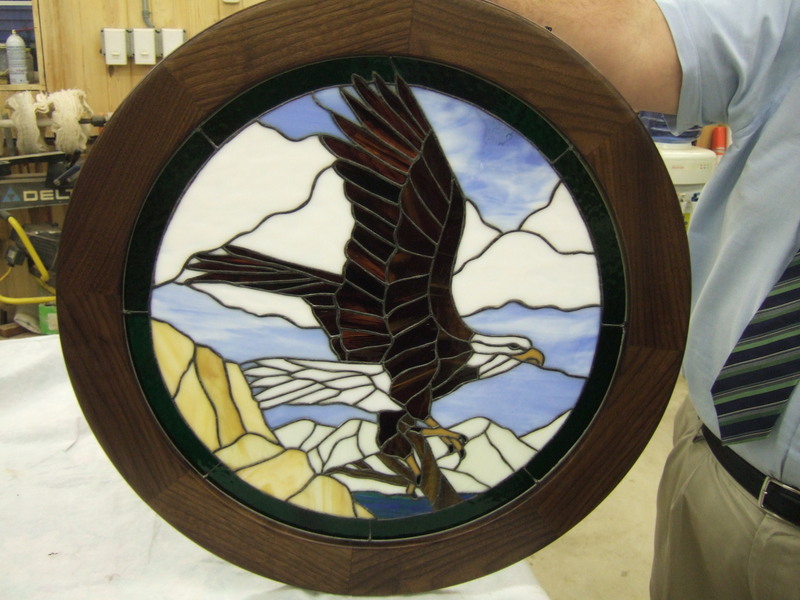
Here is the final result after finish sanding, boiled linseed oil, the three coats of General Finishes ArmRSeal top coat. |