|
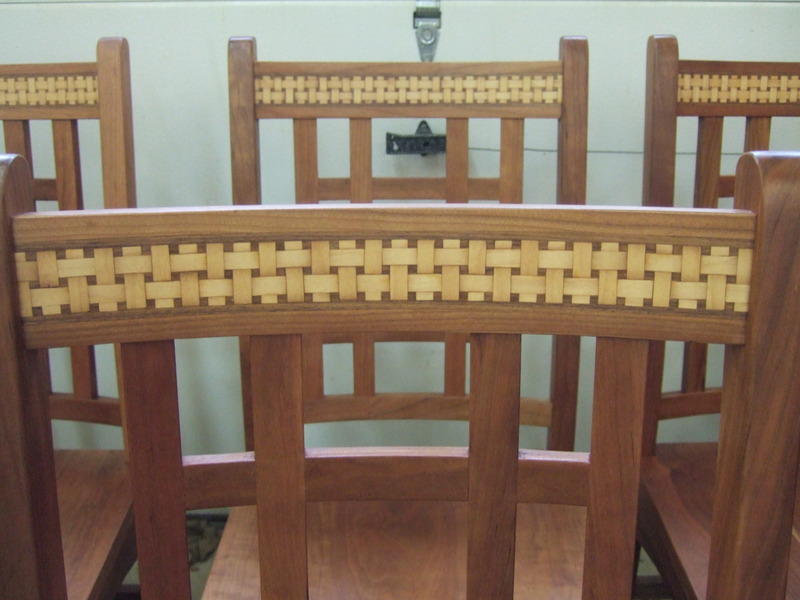
Here is a closer picture of the
parquetry in the chair-back. The curved back is made
from 1/8" cherry strips that
are laminated in a form. The top lamination is the
parquetry
pattern made from 1/42" veneer.
|
|
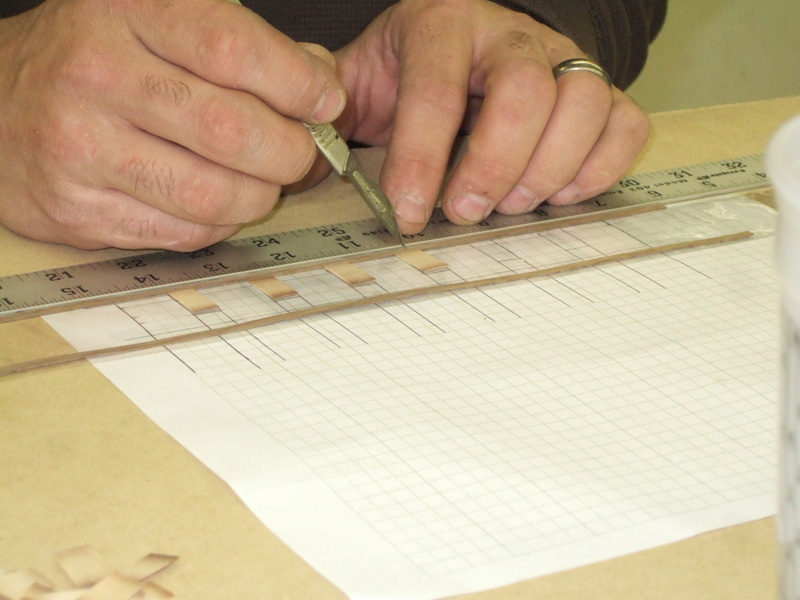
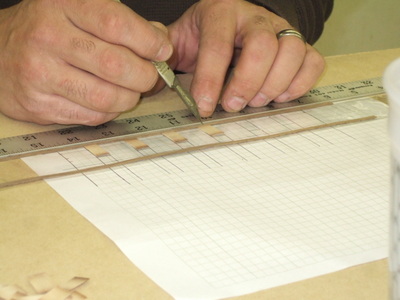
The process starts by drawing the
pattern on a piece of graph paper. Clear packing
tape is placed over the graph paper sticky side up and
fixed so it will not move. Each piece of the pattern
is "picked and placed" on the sticky side of the packing
tape, one piece at a time.
|
|
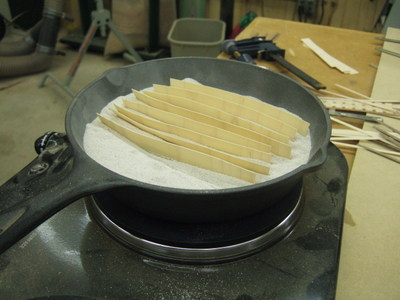
Sand shading is done in a batch to give
the feel of depth to the overall image. Each of
these strips will be cut into individual strips after
shading. It is simply more efficient to shade the
veneer this way rather than first cutting to final size
then shading.
|
|
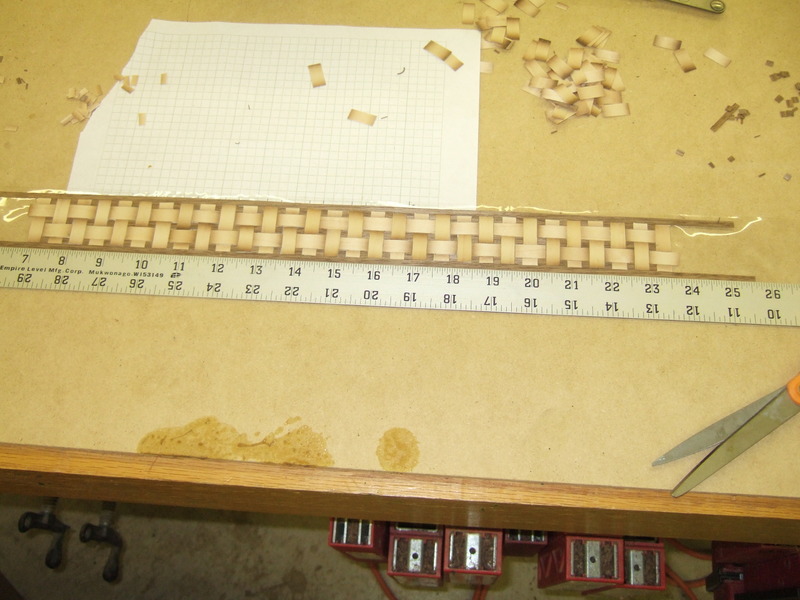
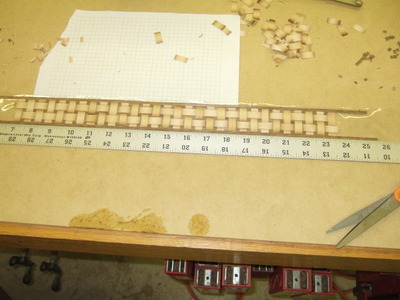
With patience, after an hour or so you
end up with something like this. Note that all the
pieces are stuck to the sticky side of the packing
tape. The packing tape will remain in place
throughout the bent lamination process.
|

|
A closer look.
|

|
Urea Formaldehyde glue is used to create
the laminated chair back. This glue has a long
working time and forms an absolutely rigid glue
bond. A rigid glue bond keeps the curved lamination
from springing back after removal from the form.
|
|
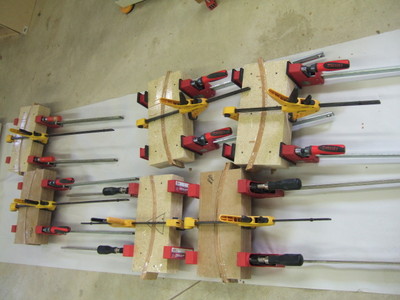
We made several forms to speed up the
process. Each chair back lamination consists of
seven 1/8 in thick pieces of cherry. The parquetry
pattern (still on the packing tape) is the outermost
lamination.
|
|
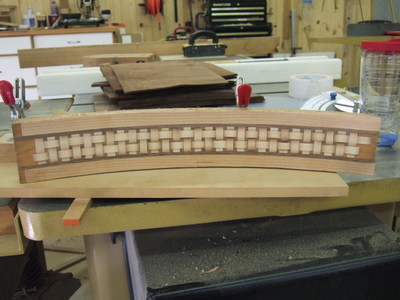
After drying in the form for 12 hours
the chair back is taken out and the packing tape is
removed. You can see we added the wider cherry bands
on either side of the parquetry pattern to give the final
appearance that the parquetry image is embedded in the
solid cherry chair back.
|
|
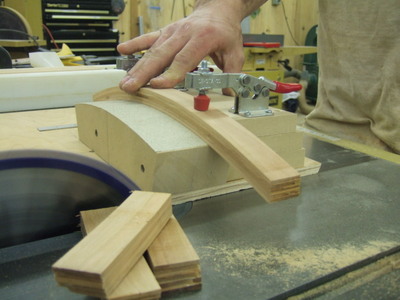
All the curved parts for the chair backs
are glue lamination are intentionally made over
sized. We made several table saw jigs like the one
you see here to safely trim each piece to the correct
length. The curve on the form exactly matches the
curve on the piece being cut. This all begins with a
single master template from which me make both the gluing
form and these cutting jigs.
|
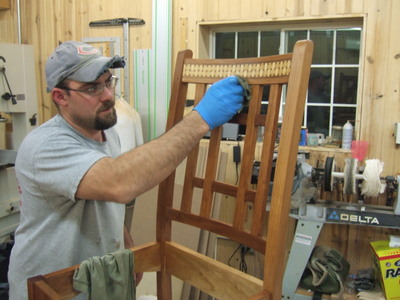
|
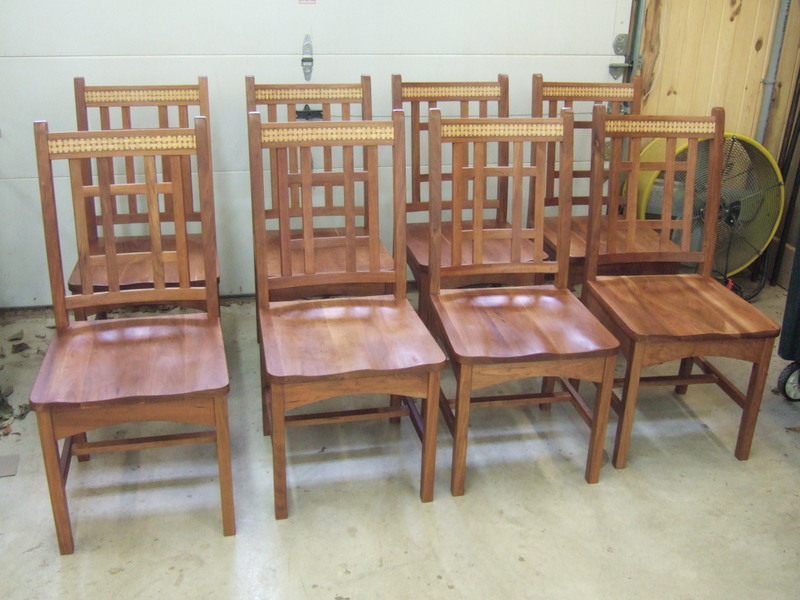
After final assembly it is time for
finishing. The finish we selected was a very thin
seal coat of shellac followed by boiled linseed oil.
After the linseed oil is fully dried a polyurethane top
coat is applied.
|